Power Your Deer Feeder with a Solar Panel: A Practical Guide
Learn to power a deer feeder with a solar panel. This step-by-step guide covers sizing, wiring, mounting, and maintenance for reliable year-round feeding.

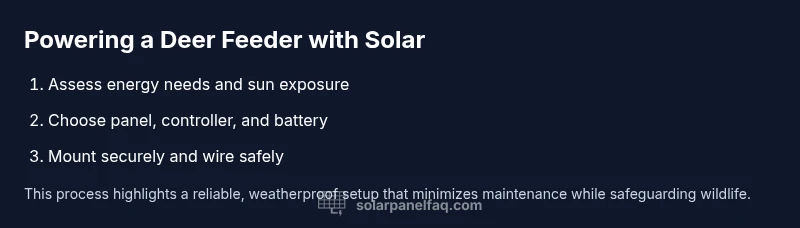
Power a deer feeder with solar by sizing the panel, selecting a compatible battery and controller, and weatherproofing the mount. This concise guide covers setup essentials, safety considerations, and maintenance for reliable year-round operation.
Why solar power makes sense for deer feeders
According to Solar Panel FAQ, solar power makes deer feeders more reliable by eliminating daily battery changes and reducing noise. A solar-powered feeder uses daylight to replenish a battery that runs the motor, timer, and sensor system. For homeowners and wildlife watchers, this means fewer visits to the feeder site, less disturbance to wildlife, and more consistent feeding during dawn and dusk when deer are active. The key is to balance the system so it can store enough energy to cover cloudy days and winter conditions.
In practice, you’ll set a daily energy budget based on how long the feeder runs, the feed rate, and any sensors or actuators. A typical setup uses a panel in the 20-100 watt range paired with a deep-cycle 12-volt battery. However, the exact numbers depend on your location, sun hours, and feeder design. This article focuses on practical, safe steps that homeowners can follow without specialized tools.
We’ll cover sizing, installation, maintenance, and common mistakes to avoid. The goal is reliable operation across seasons, minimal maintenance, and thoughtful wildlife stewardship. By planning ahead, you can reduce the risk of feed outages during critical periods while keeping your costs predictable.
How solar panels convert sun to usable power for feeders
Solar panels convert sunlight into direct current (DC) electricity via photovoltaic cells. The produced voltage is then regulated and stored in a battery for use by the feeder’s motor, timer, and sensors. For deer feeders, the goal is to ensure enough energy is available to operate during feeding windows and to recharge the battery after cloudy days. A basic understanding of volts, amps, and wattage helps you choose components that work together and avoid wasting energy.
In practical terms, a 12-volt system with a suitable charge controller will manage charging from the panel to the battery and then supply power to the feeder. MPPT controllers optimize charging in variable sun, while PWM controllers are simpler and often adequate for small setups. The choice affects efficiency, especially in winter or partially shaded sites, so weigh cost against potential energy yield.
Key components: panel, battery, charge controller, and load
A solar-powered deer feeder relies on four core components:
- Solar panel: Converts sunlight to electrical energy. Choose a wattage that meets the daily draw of the feeder.
- Charge controller: Regulates charging from the panel to the battery, protecting against overcharging. MPPT controllers can improve efficiency in variable conditions.
- Battery: Stores energy for feeding times and overcast days. A deep-cycle 12V battery is standard for off-grid setups.
- Load/feeder: The motor, timer, and sensors that drive feeding events. Ensure the wiring and connectors can handle the load and exposure to the elements.
Other useful elements include a weatherproof enclosure, proper cabling (with appropriate gauge), fuses or breakers, and mounting hardware. The goal is a durable, weatherproof system that operates reliably with minimal maintenance.
Sizing the system: panel wattage, battery capacity, and daily load
System sizing starts with estimating the feeder’s daily energy use. If the feeder runs for a few minutes during dawn and dusk, you can calculate a rough daily amp-hour (Ah) requirement and translate that into a panel wattage and battery capacity. Sun hours in your region determine how much energy a given panel can deliver daily; sites with higher sun hours require smaller panels for the same load. A rule of thumb is to oversize modestly to cover cloudy days and seasonal changes.
Battery capacity should be selected to cover the expected energy draw for multiple days between visits or after storms. The controller must be matched to the panel and battery so voltage stays within safe ranges. For most residential setups, a 12V system with a panel in the 20–100W range and a 12V deep-cycle battery provides a practical balance of cost and reliability. Always account for safety margins and temperature effects on battery performance.
Wiring and safety basics
Wiring for a solar deer feeder should be organized, weatherproof, and clearly labeled. Start at the panel, run weatherproof conduit to the charge controller, then connect to the battery, and finally the load side (feeder). Use appropriate fuses close to the battery terminals and ensure polarity is correct to prevent damage. Keep all exposed conductors off the ground and away from potential chewers or wildlife interference. Tests with a multimeter ensure proper voltage and continuity before first use.
Safety notes: disconnect power before working inside enclosures, never work on live circuits in wet conditions, and use a grounded system where feasible. If you’re unsure about wiring, consult a qualified electrician or a local extension service. A clean, secure wiring layout reduces heat buildup and prolongs component life.
Location and mounting: weatherproofing and sun exposure
Select a site with consistent sun exposure, minimal shading, and a stable mounting surface. The panel should face true south (in the Northern Hemisphere) or true north (in the Southern Hemisphere) for maximum year-round energy capture. Angling the panel to optimize winter sun while avoiding direct exposure to debris or heavy snowfall improves performance. Mounts should be sturdy, corrosion-resistant, and able to withstand wind, rain, and animal interaction. Use a protective rain cover and seal all entry points in enclosures to prevent moisture intrusion.
Additionally, position the feeder so that the energy-rich side of the system is protected from nuisance animals and weather. A well-chosen height reduces the risk of snags and allows quick maintenance checks. Regular inspections after storms help catch loose fittings or sideways panel angles early.
Monitoring and maintenance plan
An effective solar feeder setup uses simple monitoring to catch issues before they become outages. Check battery voltage regularly, especially after long cloudy spells or cold snaps. Inspect wiring for wear and tear, clean the panel surface of dust and debris, and verify that the feeder is still operating on schedule. A basic log—date, voltage, feeding times—helps you spot trends and plan replacements before failures occur. Consider a basic battery health test each season and replace aging components proactively to maintain reliability.
Maintenance should be minimal but consistent. Schedule a quarterly check and a more thorough annual audit, including tightening hardware, testing fuses, and updating any software timers in the feeder.
Cost considerations and legal/ethical considerations
Solar feeder setups vary in cost based on panel wattage, battery type, controller quality, and mounting hardware. While high-efficiency MPPT controllers and larger panels increase upfront costs, they can reduce long-term energy losses and maintenance trips. Compare total installed cost, expected lifespan, and warranty coverage when choosing components. Legally, some jurisdictions regulate wildlife feeding; ensure compliance with local regulations and ethical guidelines to avoid attracting predators or creating wildlife management concerns. Solar-powered feeders also reduce fuel and battery waste compared with frequent battery replacements, aligning with broader environmental goals while delivering consistent feed timing.
In terms of maintenance, plan for seasonal adjustments in sun exposure and deer activity. A modest investment in durable components can pay off in reliability and lower upkeep over time.
Troubleshooting quick-start guide
If the feeder stops delivering feed consistently, start with the simplest checks: verify the panel is clean and receiving sunlight, confirm the battery is charged, and ensure the controller is powered on. If voltage at the battery is low, inspect wiring connections and look for corrosion. For cloudy periods, confirm you have adequate battery capacity and consider increasing panel size or adding a secondary battery for redundancy. If the system still fails, consult the manufacturer’s guide or contact a local extension office for region-specific advice.
Tools & Materials
- Solar panel (20–100W range typical)(Select based on daily load and sun hours; avoid panels undersized for expected runtime)
- Charge controller (MPPT preferred for efficiency)(Match to panel voltage and battery type)
- 12V deep-cycle battery(Choose AGM or gel; ensure enclosure is weatherproof)
- Battery enclosure(Secure, vented, and mounted off the ground)
- Weatherproof mounting hardware(Brackets, lag screws, gaskets; corrosion-resistant)
- Appropriate electrical cabling (AWG 12-14)(Use outdoor-rated conduit and weatherproof connectors)
- Fuses or circuit breakers(Place close to the battery; protect all conductors)
- Weatherproof enclosure for electronics(Keep the controller and connections dry)
- Multimeter or DC voltage tester(Helpful for diagnostics and troubleshooting)
Steps
Estimated time: 60-180 minutes
- 1
Assess energy needs and site
Estimate how long the feeder runs each day and at what feed rate. Review sun exposure and potential shading. This will drive panel wattage and battery capacity decisions.
Tip: Document typical feeding times and durations for accurate sizing. - 2
Select panel, battery, and controller
Choose a panel with sufficient wattage for your daily load and a battery with enough Ah to cover cloudy days. Pick a charge controller suitable for the panel voltage and battery chemistry.
Tip: If in doubt, oversize slightly to provide a buffer on low-sun days. - 3
Mount the panel securely
Install on a stable surface with a clear sun-facing orientation. Use weatherproof hardware and sealant to prevent moisture intrusion.
Tip: Check for shade from nearby trees, fences, or structures in different seasons. - 4
Run wiring to the controller
Route panel wiring through weatherproof conduit to the charge controller. Keep runs short to minimize voltage drop.
Tip: Label cables and keep connections clean and dry. - 5
Connect battery and controller
Connect the battery to the controller first, then connect the panel. Install fuses close to the battery terminals.
Tip: Double-check polarity before powering on. - 6
Connect the feeder load
Wire the feeder motor/timer to the controller’s load output. Ensure the wiring is rated for the motor current.
Tip: Use a strain relief and protect from moisture. - 7
Test the system
Power up and verify charging current, battery voltage, and feeding schedule. Adjust timer if needed.
Tip: Keep a log of voltage and feeding events for trend analysis. - 8
Tighten and weatherproof
Seal all entry points, re-check seals after first rain, and secure all components.
Tip: Inspect after storms for loose fittings or damage. - 9
Set up monitoring plan
Establish a routine to check battery health, panel cleanliness, and feeder operation.
Tip: Schedule seasonal checks and keep spare parts handy.
Frequently Asked Questions
What is the simplest solar setup for a deer feeder?
A basic 12V system with a small panel (20-50W), a 12V deep-cycle battery, and a PWM or MPPT controller can power a basic feeder. It’s best for small properties with consistent sun.
A basic 12V setup with a small panel, a battery, and a controller can power a simple feeder on sunny days.
How many watts do I need for reliable winter operation?
Winter needs depend on sun hours and the feeder’s draw. Plan for lower solar insolation and larger battery capacity to cover multiple days without sun.
Winter operation depends on sun hours and the feeder’s draw; larger batteries help cover several days without sun.
Should I use PWM or MPPT for my feeder?
MPPT controllers are more efficient, especially with variable sun, but PWM can be adequate for small loads and tighter budgets.
MPPT is more efficient in variable sun, but PWM can work for smaller setups.
Can I install this myself, or do I need a professional?
Many homeowners can install a basic solar feeder with careful planning and safety precautions. If you’re unsure about electrical wiring, consult an electrician or extension service.
You can often install it yourself with care, but consult a pro if wiring concerns arise.
What maintenance does a solar deer feeder require?
Regular checks include battery health, panel cleanliness, and securing connections. Replace aging components proactively to avoid outages.
Check the battery, clean the panel, and secure connections regularly.
Are there legal considerations for feeding wildlife with solar systems?
Local wildlife feeding regulations vary. Check state or local rules to ensure compliance and avoid unintended ecological impacts.
Check local regulations to ensure compliant and responsible feeding practices.
Watch Video
Top Takeaways
- Plan energy use before buying components
- Size panel and battery with buffers for cloudy days
- Choose weatherproof, durable hardware
- Prioritize safe wiring and secure mounting
- Set a regular maintenance and monitoring routine