400W Solar Panel Size: Dimensions, Weight, and Layout Tips
Learn the typical dimensions, weight, and layout considerations for a 400W solar panel, plus practical sizing guidelines, mounting tips, and a data-driven comparison to other wattages.

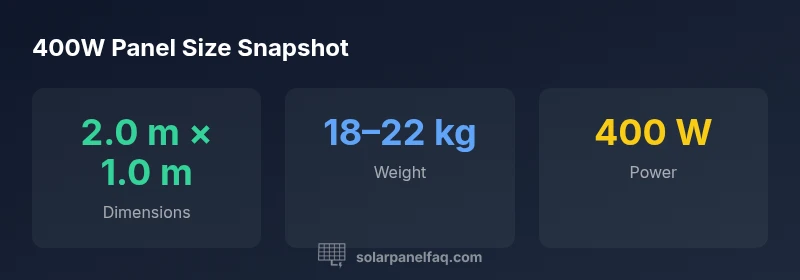
A typical 400W solar panel measures about 2.0 m by 1.0 m and weighs roughly 18–22 kg. Dimensions vary by model and cell technology, but the footprint is designed for efficient rooftop layouts. Always verify exact length, width, height, and mounting hole spacing on the datasheet.
Understanding 400W Panel Size
According to Solar Panel FAQ, homeowners planning a rooftop installation should start with a sizing assessment anchored by the panel dimensions. A typical 400W module occupies roughly 2.0 meters in length and about 1.0 meter in width. This footprint translates into about 6.5 to 6.9 feet long and 3.3 feet wide. While height can vary with frame design and cooling fins, most devices remain under 3 inches thick. The goal is to maximize shade-free surface area while keeping wiring and mounting clearances practical. This sizing information informs how many panels you can fit on a given roof area and helps align with the inverter and mounting hardware you choose.
Dimensions and Variations
Panel dimensions have become more standardized across manufacturers, yet there is still variation. Expect common 400W models to measure near 2.0 m by 1.0 m, with tolerances of +/- 5 cm in length and width depending on cell layout (monocrystalline vs. polycrystalline) and frame design. Some panels use slightly longer modules to optimize electrical performance, while others emphasize compact frames for space-constrained roofs. Always read the datasheet for exact length, width, thickness, and mounting hole spacing. Size consistency matters for rail alignment and compatible racking systems. If you need precise fit, request a full CAD drawing from the installer or manufacturer.
How Size Affects Roof Layout and Wiring
The physical size of a 400W panel directly influences roof layout. Larger panels reduce the number of modules needed but may demand more roof area and careful alignment to minimize shading. Wiring length and string configurations are also impacted: longer runs introduce voltage drop and may alter the inverter string design. Practical planning includes mock layouts on a roof map and, if possible, a physical trim with mock panels during installation. Consider orientation (typically south-facing in the northern hemisphere) and the impact of eaves, skylights, and vents on panel placement.
Comparing 400W to Other Wattage Classes
Compared to 350W or 360W panels, 400W modules provide higher power density, which can reduce the number of strings and racking hardware. However, the footprint remains a key constraint on low-slope roofs. If space is tight, a higher-efficiency 420–430W option could offer better output in a similar footprint, but availability, cost, and warranty terms should be weighed. Efficiency and temperature performance may also vary by model, so compare the performance at standard test conditions (STC) and real-world conditions for your roof climate.
Practical Sizing Guidelines for Your Roof
Begin with a roof area assessment: estimate usable surface after accounting for shading from trees or vents. Typical residential roofs can accommodate 8–20 modules of 400W class panels, depending on roof size and orientation. Verify the roof’s weight-bearing capacity and ensure your mounting hardware is rated for local wind speeds. Collaboration with a licensed installer helps ensure correct orientation (south-facing in the northern hemisphere) and suitable wire routing. Create a staged plan that accounts for future expansion if you anticipate higher energy needs or changes in roof space. Always confirm the actual payload your structure can bear before mounting heavy arrays.
Choosing the Right Mounting and Racking
Select a mounting system that supports the panel size and weight. Verify rail spacing, end clamps, and mid-clamps align with the actual module dimensions. Ground clearance, tilt angle, and ventilation play roles in long-term performance and durability. For homes with curved or metal roofs, specialty mounting solutions may be required to achieve optimal exposure and wind resistance. Work with an installer to certify the mounting hardware’s wind zone rating and to ensure electrical code compliance for your area. A well-chosen racking system reduces maintenance and simplifies future module swaps or layout changes.
Size and spec snapshot for 400W solar panels
| Aspect | Typical dimensions | Notes |
|---|---|---|
| Dimensions | 2.0 m x 1.0 m | Common for 400W panels |
| Weight | 18–22 kg | Installer should account for roof load |
| Power rating | ~400 W (nominal) | Model variations exist |
Frequently Asked Questions
What are the standard dimensions of a 400W solar panel?
Most 400W panels measure roughly 2.0 m by 1.0 m, with model variations. Always check the datasheet for exact numbers and mounting hole spacing.
Most 400W panels are around two by one meters in footprint; check the datasheet for exact measurements.
How does panel size affect roof layout?
Larger panels change layout and shading considerations; plan with mock-ups and consider spacing to avoid shade.
Larger panels affect layout and shading; plan ahead.
Are 400W panels compatible with common inverters?
Yes, they typically pair with standard residential inverters. Verify voltage, current, and maximum input specs match your system design.
They usually work with standard inverters; confirm specs with your installer.
Do 400W panels require special mounting hardware?
Usually not. Standard mounting rails and clamps work, but verify weight, wind load, and hole patterns to ensure secure installation.
Usually no special hardware needed; confirm with installer.
Where can I find reliable dimensions for a specific model?
Consult the manufacturer’s datasheet or speak with a licensed installer for exact measurements and mounting details.
Check the manufacturer datasheet or installer.
What should I consider besides size when choosing a panel?
Consider efficiency, warranty, thermal performance, and compatibility with your mounting system to optimize long-term output.
Look at efficiency and warranty too.
“400W panels offer strong performance when sized and oriented correctly; understanding dimensions helps maximize rooftop output.”
Top Takeaways
- Plan for about a 2.0 m by 1.0 m footprint for most 400W panels
- Expect 18–22 kg weight per panel; verify roof load capacity
- Check datasheet for exact mounting hole patterns and frame dimensions
- Higher power density can reduce hardware count, but space matters
- Coordinate with inverter sizing and roof orientation for best output