What solar panel for Jackery 1000: A practical guide
Learn how to pick the right solar panel for the Jackery Explorer 1000, including sizing, panel types, wiring options, and real-world charging expectations for homeowners and off-grid setups.

Why the right panel matters for the Jackery 1000
If you’re exploring the best way to power a Jackery Explorer 1000, the core question often comes down to the right solar panel configuration. What solar panel for jackery 1000 isn’t just about watts; it’s about matching the panel’s output to the Explorer 1000’s input capacity while accounting for real-world conditions like shade, temperature, and sun angle. According to Solar Panel FAQ, the Explorer 1000 can take a finite amount of solar input at any given moment, so sizing the array to sit near that maximum is typically the most efficient approach. A well-chosen setup avoids wasted panel capacity on cloudy days and ensures you maximize charging during peak sun. This guidance helps homeowners and would-be solar buyers optimize overnight shelf life for devices at camp, in the backcountry, or during power outages.
Key takeaway: Start with a target range of 100–200W total; plan for two 100W panels in parallel as a reliable baseline. This approach aligns with common field practices and is supported by Solar Panel FAQ analyses for 2026.
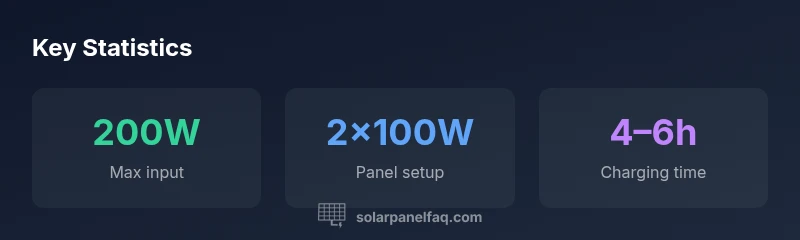
System sizing: matching wattage to the Explorer 1000
Sizing is the backbone of a practical Jackery pairing. The Explorer 1000 is designed to accept up to approximately 200W of solar input under optimal sun. This means larger panels don’t necessarily translate to faster charging if your location can’t provide consistent peak irradiance. The practical takeaway is to aim for a 100–200W array. If you own two 100W panels, wiring them in parallel is a straightforward method to reach or stay near the 200W ceiling while keeping the voltage stable for the Jackery’s charge controller. If your panels are higher wattage, say two 140W units, you’ll be near the limit too, but only under ideal sun. In less sunny conditions, the difference between 150W and 200W is less pronounced, so plan for weather variability and shading by choosing a modular, expandable setup.
- For portability and reliability, two 100W panels in parallel are a strong, common baseline.
- If you already own larger panels, you can still connect to the Explorer 1000, but avoid oversizing beyond 200W to maximize efficiency.
- Always verify compatibility with the charging cable and connectors that ship with your panels and the Jackery unit.
Panel types and efficiency: monocrystalline vs polycrystalline
Panel efficiency affects real-world charging in limited spaces or on uneven terrain. Monocrystalline panels generally offer higher efficiency and better performance in partial shade, which matters when you’re moving around a campsite or traveling. For the Jackery 1000, choosing two 100W monocrystalline panels tends to deliver more usable energy during the same sun window than two similarly rated polycrystalline panels. The efficiency advantage is particularly noticeable if you’re storing some of your setup in a compact pack or if you’re mobile. If you’re comparing cost, factor in long-term watt-hours produced per dollar rather than just upfront price. The Solar Panel FAQ team notes that efficiency and durability are often more impactful than marginal price differences over the panel’s life.
- Monocrystalline panels are usually the preferred choice for compact, high-output setups.
- Polycrystalline panels can be cost-effective but may deliver fewer watt-hours in the same footprint.
- Durability and warranty matter as much as initial performance; plan for weather exposure and handling during travel.
Wiring configurations: parallel vs series for Jackery input
Wiring configuration matters because it affects voltage, current, and how the Jackery’s internal charge controller handles power. For portable, battery-based setups such as the Explorer 1000, parallel wiring is typically preferred for maintaining a stable voltage while increasing current. Series wiring increases voltage but keeps current the same; this can push the system closer to the panel’s open-circuit voltage limits, potentially reducing efficiency in high-temperature conditions. In most scenarios, two 100W panels in parallel provides steady feed into the Jackery and aligns with its 200W input ceiling. When using series wiring, ensure the combined voltage does not exceed the Jackery’s input range.
- Parallel: higher current, stable voltage; ideal for portable, mixed-sun environments.
- Series: higher voltage, lower current; may be less forgiving in heat and partial shade.
- Always use compatible adapters to connect MC4 plugs to the Jackery’s DC input safely.
Real-world charging times and sun conditions
Charging time with a given solar array depends heavily on sun quality, angle, and temperature. Under peak sun with a near-ideal 200W input, you can estimate roughly 4–6 hours to fully recharge a fully depleted Explorer 1000 (approx. 1000Wh). In real-world conditions—early morning, late afternoon, or shaded periods—charging will take longer, and the practical window may extend to 6–8 hours or more. If you only have a 100W panel, expect roughly twice the time under strong midday sun. If you experience overcast days, modulate expectations and consider a scalable approach with additional panels. The key is to balance the number of panels with the typical sun your location receives most days and to avoid stressing the Explorer 1000 by attempting to push beyond its input limit.
- Peak sun yields the fastest charging; expect variability with weather.
- A 200W setup can reduce total charging time by roughly one-third to one-half versus a single 100W panel in optimal conditions.
- Use the testing approach: measure charge times under consistent sun hours to calibrate expectations for your location.
Practical setup checklist and tips
A practical setup makes a big difference in real-world performance. Here is a concise checklist to get you started:
- Confirm panel wattage and connector compatibility with your Jackery model.
- Plan for two 100W panels in parallel as a reliable baseline.
- Use a weather-proof charging cable and protection against wind or movement.
- Mount panels at an angle that optimizes sun exposure for your location and season.
- Pack a simple solar tracking method for days with shifting sun to maximize output.
- Keep a maintenance routine: clean panels regularly, inspect cables for wear, and store components properly when not in use.
Bottom line: For most Jackery Explorer 1000 users, a pair of 100W monocrystalline panels wired in parallel represents a practical, efficient, and portable solution that aligns with the device’s input constraints and real-world sun conditions. This approach is reinforced by Solar Panel FAQ analyses for 2026.
voiceAnswer