Portable Solar Panel for Apartment: A Practical Guide
Discover how homeowners can use portable solar panels in apartment settings—sizing, safety, setup, and maintenance tips for balconies, windows, and small power needs.

A portable solar panel for apartment lets you charge small devices and buffer essential power during sunny days without permanent installation. You’ll need a compact, foldable panel, a USB-friendly battery or power bank, and a safe mounting option for a balcony or window. This guide shows how to size, set up, and optimize use in limited spaces.
Why apartment portability matters
Living in an apartment often means compromises about power access and outdoor space. A portable solar panel designed for apartment use provides a practical way to capture sunlight on a balcony, window ledge, or shared terrace, without permanent installation. According to Solar Panel FAQ, portable solar panels designed for apartment settings offer flexibility for balcony and window mounting but must scale with the realities of limited sun exposure and urban shading. The Solar Panel FAQ team found that many homeowners begin with compact, easy-to-move setups that can charge smartphones, tablets, small battery packs, and other essentials without relying entirely on the grid. This introductory reality sets expectations: you’re unlikely to power large appliances, but you can extend usable energy for daily devices and emergency back-up. Throughout this guide, we’ll cover sizing, mounting options, safety considerations, and practical steps to evaluate whether portable solar fits your apartment lifestyle. The goal is clarity and practicality, not hype—so you can make a confident, informed choice about portable solar in compact living spaces.
Tools & Materials
- Foldable portable solar panel (compact, weather-resistant)(Prefer units with built-in cable management and a clear output spec.)
- Charge controller or power bank(If the panel lacks a built-in controller, use a USB-C PD power bank or a separate controller.)
- Battery pack or portable power bank(Choose a capacity that matches your typical devices' needs.)
- Non-permanent mounting accessories(Suction cups, adjustable stands, or balcony railing clamps.)
- Extension cables (as needed)(Use weather-rated cables and keep routes clear of trip hazards.)
- Safety gear(Gloves and non-slip footwear for handling equipment.)
Steps
Estimated time: 60-90 minutes
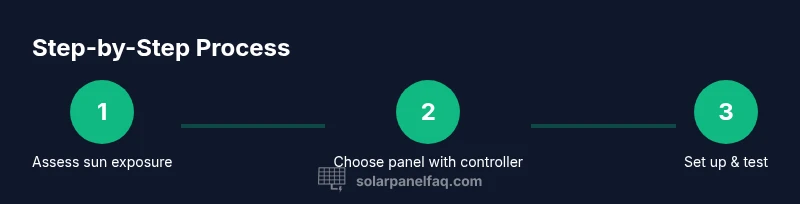
- 1
Assess sun exposure
Identify the best sunlit spot in your space (balcony, window, or terrace). Check how long that spot stays in direct sun during peak hours and note any shading from nearby buildings. The goal is consistent sun, not sporadic light. This planning step helps you avoid buying a panel that cannot deliver steady output.
Tip: Spend 5–10 minutes observing light patterns to pick the optimal location. - 2
Choose a panel with built-in controller
Select a portable panel that includes a built-in charge controller or is paired with a dedicated battery/box. MPPT controllers are more efficient when sun angles shift, while PWM controllers are simpler and adequate for small loads.
Tip: If you’re new, start with a bundled panel-and-battery setup to reduce wiring complexity. - 3
Gather and organize your setup
Lay out the panel, controller, battery, and output cables in a dry, clean area. Check all connectors for wear, and confirm you have the correct adapters for your devices.
Tip: Keep cables tidy to avoid trips and ensure heat dissipation around the equipment. - 4
Position panel for optimal sun
Place the panel in direct sun whenever possible, using non-permanent mounts if you don’t want to alter walls or railings. Adjust tilt to maximize exposure as the sun moves across the sky.
Tip: A slight tilt toward the sun’s path significantly improves energy capture. - 5
Connect to the battery or device
Attach the panel output to the charge controller or battery input first, verifying polarity. Then connect your device or inverter as needed. Do a quick voltage check before full operation.
Tip: Always verify polarity to avoid damaging sensitive electronics. - 6
Test, monitor, and adjust
With sun exposure, monitor the battery voltage or device charge level. If output is low, reposition or reorient the panel; on cloudy days, rely on stored energy for essential use.
Tip: Note how long you can sustain charging in typical sun conditions to set realistic expectations.
Frequently Asked Questions
What is a portable solar panel?
A foldable or lightweight solar panel designed for easy transport and temporary use, often with a built-in battery or charger. It’s ideal for renters who need flexible, non-permanent power sources.
A portable solar panel is a foldable, light panel you can move where you need sun and charge small devices without drilling or permanent installation.
Can I power a laptop with a portable solar panel in an apartment?
Yes, but you’ll typically need a panel paired with a battery pack and a suitable inverter or USB-C PD interface. Ensure the panel’s output matches the battery’s input requirements.
Yes, you can power a laptop if you pair the panel with a proper battery and the right connector.
Are non-permanent mounting options safe for apartments?
Yes, use non-permanent methods like suction mounts, portable stands, or railing clamps. Avoid drilling or attaching fixtures to walls or railings without building permission.
Non-permanent options are generally safe and best for renters who want flexibility.
What are common limits of apartment solar setups?
Sun exposure is often limited by space and shading. Portable systems supplement daytime charging but rarely power large appliances. Rely on batteries and stored energy for reliability.
Sun exposure is limited, so use portable solar to support essential devices rather than run big loads.
Do portable panels require maintenance?
Yes, keep panels clean, inspect cables for wear, and store gear dry. Periodic checks help maintain performance and safety.
Yes, a quick clean and check keeps performance up and prolongs life.
How do I choose between MPPT and PWM controllers?
MPPT controllers extract more energy from the panel especially when sun angles shift; PWM is simpler and fine for basic setups.
MPPT is more efficient for variable sun, PWM is simpler for small setups.
Watch Video
Top Takeaways
- Identify a sunlit apartment spot with minimal shading.
- Choose a portable panel with integrated controller for simplicity.
- Pair the panel with a suitable battery or power bank for reliable charging.
- Test and adjust daily to maximize energy capture in changing conditions.