Pigeon Proofing Solar Panels: A Complete How-To Guide
Learn practical techniques to protect rooftop solar panels from pigeons, with step-by-step methods, deterrent options, and maintenance tips to safeguard performance and warranties.

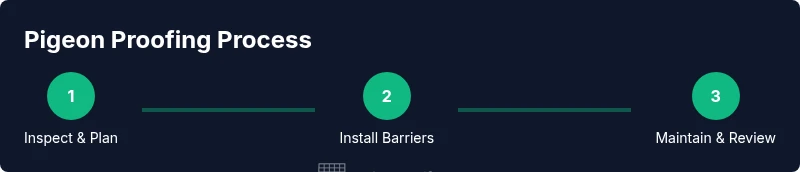
By pigeon proofing solar panels, homeowners prevent nesting, droppings, and panel shading that reduce performance. This guide shows how to assess your roof, select deterrents, and install barriers safely. Key requirements include a stable ladder, non-corrosive materials, and a maintenance plan to keep deterrents effective year-round. This quick overview helps you decide on a DIY approach or professional help.
What is pigeon proofing solar panels and why it matters
Pigeon proofing solar panels is the process of deterring roosting and nesting around rooftop solar installations. Pigeons can cause droppings that corrode wiring, clog vents, and shade panels, reducing efficiency. According to Solar Panel FAQ, effective pigeon proofing solar panels combines assessment, deterrents, and a maintenance routine. The goal is not only to keep birds away but to protect warranty terms and long-term performance. A thoughtful approach begins with understanding bird behavior, then selecting a layered strategy that fits your roof type and budget. In practice, pigeon proofing solar panels means identifying roosting hotspots, selecting compatible barriers, and scheduling regular inspections to adjust deterrents as birds adapt. This is a practical, safety-conscious project for homeowners who want to preserve system output and minimize cleanup after storms or seasonal migrations.
How pigeons affect rooftop systems and why deterring them helps
Pigeons perch on solar arrays to rest, nest, and even raise young. Their droppings are acidic and can corrode metal frames and connectors, lead to clogged drainage, and create a slippery surface that poses safety hazards during cleaning or maintenance. When pigeons roost, shaded panels experience uneven heating and increased soiling, which reduces energy output. In severe cases, pests can interfere with wiring, vent blocks, and junction boxes. A robust pigeon proofing solar panels plan reduces these risks by limiting roosting sites, discouraging nesting, and encouraging birds to move away from the installation. Regular cleaning and inspection remain essential because lingering droppings can attract other pests and obscure potential damage.
Assessing your roof layout for pigeon-proofing
Before any deterrent is installed, map out roosting hotspots around your solar array. Note edges, vents, gaps, and adjacent shade that may attract pigeons. Consider whether your roof is pitched or flat, the material (metal, tile, or shingles), and the spacing between panels. A well-planned pigeon proofing solar panels approach accounts for roof access points, gutter locations, and potential entry routes for birds. By understanding the layout, you can tailor barriers to best fit your roof type and maximize deterrent effectiveness without compromising panels or airflow.
Physical barriers: nets, shields, and spikes
Barriers are the most reliable first line of defense for pigeon proofing solar panels. Netting can block access to the underside of panels, while edge spikes deter roosting along rails and risers. Shields or edge caps can close small gaps that pigeons use to perch. When selecting barriers, choose corrosion-resistant materials and ensure installation does not trap debris or obstruct airflow. Always start with the least invasive barrier that covers the most roosting spots and test its effectiveness before layering more deterrents.
Deterrents and deterrent placement: gels, tapes, reflections
Deterrents such as reflective tapes, non-toxic gels, and UV-visible markers can disrupt pigeons’ daytime roosting behavior. Place deterrents at known roosting ledges, gaps between panels, and along roof edges where birds typically settle. Reflective surfaces and moving parts create visual cues that discourage perching without harming birds. Avoid applying deterrents directly on photovoltaic surfaces, which could affect efficiency or warranty terms. Combine deterrents with barriers for a multi-layered pigeon proofing solar panels strategy.
Choosing barriers for different roof types
Your roof type strongly influences which barriers are most effective. For flat roofs, nets and overhead barriers work well, but ensure they don’t obstruct panel cooling or access for maintenance. For pitched roofs, spikes along the eave lines and nets over panel arrays often perform best. If your panels sit near roof edges, consider edge shields to prevent perching where most pigeons land. Always verify compatibility with roof material and ensure no damage occurs to surrounding components.
DIY installation steps: a practical sequence
A DIY pigeon proofing solar panels plan can be executed in a logical sequence: first, assess the site and gather materials; second, install non-invasive barriers along edges; third, place deterrents in roosting hotspots; fourth, seal any obvious gaps; fifth, test the setup and observe for changes; sixth, schedule maintenance visits. Document each step with photos to reference for future adjustments. Safety should guide every action, especially when working on elevated rooftops.
When to hire a professional and what to expect
If your roof is steep, crowded with obstructions, or you’re unsure about safe access, hiring a professional is wise. A pros-only pigeon proofing solar panels approach can ensure code-compliant installation, appropriate barrier selection, and a documented maintenance plan. Ask for references, warranty considerations, and a written assessment of roosting activity before any work begins. Professionals may use heavier-duty barriers or custom installations not feasible for DIY setups.
Maintenance and ongoing inspection schedule
Pigeon proofing solar panels is not a one-off task. Schedule regular inspections after seasonal changes, storms, or shifts in bird activity. Clean droppings safely, check barrier placements, and tighten fasteners as needed. Replace or reposition deterrents if pigeons adapt or if panels’ orientation creates new roosting opportunities. Keeping a maintenance log helps you track efficacy and reduces the risk of gaps in protection.
Quick-start action plan and long-term strategy
Conclude with a practical, long-term plan: start with a site assessment, mount primary barriers, add deterrents, seal gaps, then monitor results for several weeks. Maintain records and adjust deterrents as needed to respond to changing bird behavior. A consistent, layered approach—barriers plus deterrents plus routine upkeep—offers the most reliable pigeon proofing solar panels strategy and protects your investment over time.
Tools & Materials
- Ladder(Sturdy, roof-height; use stabilizer and leveler if needed)
- Safety harness and fall-arrest system(Attach to secure roof anchors; follow manufacturer instructions)
- Work gloves(Leather or synthetic, cut-resistant recommended)
- Safety goggles(Protect eyes from debris and windborne particles)
- Drill with driver and bits(Use corrosion-resistant bits for metal components)
- Pliers and wire cutters(For handling wires and fasteners)
- Measuring tape(Accurate measurements for barrier placement)
- Bird netting(UV-stable, appropriate mesh size to block roosting)
- Bird spikes (stainless steel or polycarbonate)(Non-corrosive, designed for roof edges)
- Edge shields/edge caps(Optional for roof edge perches; check roof material compatibility)
- Stainless steel zip ties(Secure nets and barriers without damaging surfaces)
- Silicone sealant(Weatherproof seal around gaps and penetrations)
- Roofing screws and sealant(For mounting barriers to roof frame or panels)
- Cleaning supplies (soft brush, mild soap)(Maintain barriers and remove droppings safely)
- Safety cones or temporary guards(Mark work zones to protect others)
Steps
Estimated time: several hours
- 1
Assess the site and define goals
Conduct a thorough assessment of the roof and panel array. Identify known roosting spots, gaps, and potential nesting sites. Define success criteria and safety procedures before touching any hardware.
Tip: Create a simple map of roosting hotspots to guide barrier placement. - 2
Inventory deterrents and barrier options
List barrier types (nets, spikes, shields) and deterrents (gels, tapes, reflective surfaces) that suit your roof material. Check compatibility with panel surfaces to avoid warranty issues.
Tip: Prefer non-invasive options initially and layer as needed. - 3
Choose barriers for your roof type
Select barriers that fit your roof type (flat vs pitched) and material (metal, tile, shingle). Plan anchor points and ensure proper drainage and airflow.
Tip: Avoid blocking panel cooling airflow or ventilation openings. - 4
Install barrier system along edges
Begin with edge barriers to deter perching on the most accessible roosting zones. Secure nets or spikes firmly using non-corrosive fasteners and verify tension.
Tip: Use a partner to help hold materials while you secure anchors. - 5
Add deterrents to remaining hotspots
Place gels, tapes, and reflective markers in gaps between panels, behind railings, and near vents where pigeons might land. Do not apply directly to PV cells.
Tip: Test a small area first to ensure no panel staining or adhesive residue. - 6
Seal gaps and entry points
Fill obvious gaps around penetrations, vent openings, and rooftop access points with silicone sealant or appropriate sealant. Ensure a clean, watertight finish.
Tip: Avoid over-sealing to prevent future maintenance headaches. - 7
Test, observe, and adjust
Observe for several weeks to confirm deterrents are effective and no new roosting paths have formed. Reposition barriers if pigeons learn to bypass them and document changes.
Tip: Keep a maintenance log with photos for reference.
Frequently Asked Questions
What is pigeon proofing solar panels and why is it necessary?
Pigeon proofing solar panels is the practice of deterring roosting and nesting around rooftop solar installations to protect performance and reduce maintenance. Birds can leave droppings that corrode components and shade panels, diminishing energy output. A layered approach that combines barriers, deterrents, and maintenance is most effective.
Pigeon proofing solar panels involves deterring birds to protect performance and reduce maintenance. Use barriers, deterrents, and regular checks to keep your system running smoothly.
Will deterrents damage panels or void warranties?
Most deterrents are designed for outdoor use and should not damage panels when used correctly. Always check your panel manufacturer and warranty terms before installation to ensure compatibility and avoid voids.
Check your warranty terms before installing deterrents to avoid any risk of voiding coverage.
How long does pigeon-proofing last?
The durability of pigeon-proofing depends on materials and climate. Regular inspection and maintenance are needed to adapt barriers as birds learn and environmental conditions change.
It lasts as long as you maintain it; inspect and adjust as needed for best results.
Can I install deterrents myself, or should I hire a pro?
Many homeowners can install basic barriers and deterrents safely with proper precautions. For complex roof layouts or high-risk work, hire a professional to ensure safety and warranty compliance.
You can do it yourself if your roof is safe to access; otherwise, hire a pro for safety and warranty.
Are there legal protections for pigeons I should know about?
Pigeons may be protected by local wildlife laws in some areas. Before taking measures, confirm regulations to ensure compliance and avoid penalties.
Check local wildlife rules before deterring pigeons to stay compliant.
Watch Video
Top Takeaways
- Start with a roof assessment and hotspot map
- Use layered, roof-type–specific barriers
- Avoid direct contact with PV cells and wiring
- Regularly inspect and adjust deterrents
- Document changes for warranty and maintenance