Mounting Structure for Solar Panel: A Practical Guide
Learn how to choose, size, and install a mounting structure for a solar panel, with practical guidance for roof vs ground mounts, wind considerations, corrosion resistance, and ongoing maintenance to maximize life and performance.

A mounting structure for solar panel is the engineered frame and hardware that secures panels to your roof or ground racks, angles them for optimal sun exposure, and distributes weight safely. Proper mounting protects against wind uplift, corrosion, and leaks, while enabling easy access for inspections. This guide covers materials, codes, and installation considerations.
Why the mounting structure matters for solar panels
A reliable mounting structure is the backbone of any solar energy system. It defines how panels are supported, angled, and protected from the elements. For homeowners, choosing the right mounting approach influences energy yield, comfort, and long-term maintenance costs. According to Solar Panel FAQ, the mounting structure sets the stage for performance, longevity, and safety, so the decision should be based on roof type, climate, and expected load. The Solar Panel FAQ team found that improper mounting can lead to leaks, wind uplift, and accelerated corrosion, which reduces panel efficiency and may require costly repairs later. In this section we’ll establish core principles and terminology you’ll encounter as you read the rest of this guide.
Key terms you’ll hear include rail systems, clamps, flashing, and ballast. By understanding what each component does, you can evaluate options without overpaying for features you don’t need. We’ll cover three common mounting scenarios—roof-mounted flush, roof-tilt with adjustable rails, and ground-mounted racks—and explain how choices in fasteners, sealants, and hardware quality affect performance in real-world conditions. Finally, we’ll discuss how to assess your site for compatibility before you commit to a design.
Keep in mind that weather, snow load, and building codes vary by location, so plan to consult local guidelines for your specific project.
subtitle_url":null},
Tools & Materials
- Mounting rails(Aluminum or stainless steel rails sized to the panel array)
- Roof or ground anchors(Structural anchors matched to roof type or foundation system)
- Clamps and brackets(Non-corrosive, compatible with rail profile)
- Standoff spacers(Achieve proper tilt and clearance from surface)
- Sealant and flashing(Prevent leaks at penetrations and joints)
- Fasteners (lag screws or concrete anchors)(Grade and corrosion-resistant; torque per spec)
- Torque wrench(To manufacturer specification for each fastener)
- Cable management clips(Optional for neat wiring routes)
Steps
Estimated time: 4-8 hours
- 1
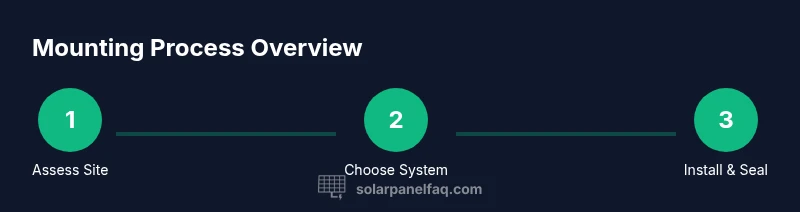
Assess site and define mounting goals
Survey your roof or yard space, noting orientation, shading, wind exposure, available space, and future expansion plans. Record measurements and determine the desired tilt angle for optimal sun exposure in your latitude. This planning step reduces rework later.
Tip: Use a laser measure to capture accurate dimensions; sketch a simple layout before buying components. - 2
Choose mounting type and rails
Decide between roof-mounted flush, roof-mounted tilt, or ground-mounted racks. Select rail profiles and clamps that match your panel frame and the anticipated load. Verify compatibility with your roof or ground surface and local code requirements.
Tip: Check panel manufacturer recommendations for rail compatibility and required fastener sizes. - 3
Prepare surface and install anchors
If roofing, install flashing and ensure waterproof continuity around penetrations. If ground-mounted, prepare a stable foundation or ballast base with level alignment. Any penetrations should be sealed to prevent leaks.
Tip: Seal any penetrations with manufacturer-approved flashing material and ensure drainage paths remain clear. - 4
Attach rails and secure hardware
Position rails according to your layout, anchor to the roof or foundation, and tighten fasteners following the specified torque. Double-check alignment and levelness before proceeding to panel placement.
Tip: Dry-fit components first to catch fitment issues without over-tightening. - 5
Mount panels and clamp them in place
Place panels one by one along the rails and secure with end clamps and mid clamps arranged per your layout. Leave small expansion gaps for thermal movement.
Tip: Tighten clamps to manufacturer recommendations and verify even pressure across the panel frame. - 6
Seal, test, and document
Seal all joints, perform a basic water test if feasible, and document mounting arrangement for future maintenance. Take photos for reference during inspections or expansions.
Tip: Keep the documentation with your installation drawings and warranty information.
Frequently Asked Questions
What is a mounting structure for solar panels?
It is the frame, rails, clamps, and hardware that secure solar panels to a roof or ground rack, providing tilt and wind resistance while keeping a clean wiring path.
A mounting structure is the frame and hardware that holds solar panels in place on your roof or yard, including rails and clamps for stability.
Do I need a professional to install mounting hardware?
If you’re unsure about roof integrity, structural loads, or local codes, hire a qualified installer. A pro can ensure proper sealing and code compliance.
If you’re not confident about loads or sealing, it’s best to hire a professional to handle the mounting hardware.
Are there different mounting methods for tile roofs?
Yes. Tile roofs require specialized flashing and clamp options to avoid tile breakage and water intrusion. A professional may customize the layout for tile or slate.
Tile roofs need special flashing and mounting methods to protect tiles and prevent leaks.
What maintenance is needed for mounting hardware?
Regular visual inspections for corrosion, loose fasteners, and sealant degradation are recommended. Reseal penetrations as needed and address any movement promptly.
Inspect for corrosion and loosened screws; reseal penetrations if you see gaps or leaks.
How long does installation typically take?
For a standard roof-mounted system with a small array, plan a full day; larger ground-mounted projects may require two days or more depending on site preparation.
Most installations take a day or two depending on the system size and site readiness.
Can mounting be done on a metal roof?
Yes. Metal roofs can use compatible rails and clamps, but you must ensure proper insulation, electrical clearance, and non-penetrating options when possible.
Metal roofs are compatible with the right rails and clamps; ensure proper insulation and clearance.
Watch Video
Top Takeaways
- Choose roof vs ground mounting based on space and access
- Prioritize corrosion-resistant materials and proper flashing
- Follow manufacturer guidance for torque and clamping
- Maintain and inspect mounting hardware regularly