How Hard Are Solar Panels to Install? A Practical Guide
Learn whether solar panel installation is DIY-friendly, what factors affect difficulty, and when to hire professionals. This educational guide covers steps, timelines, safety considerations, and preparation for homeowners and future solar buyers.

Short answer: how hard are solar panels to install? For most homeowners, the process is moderate to challenging and involves structural checks, securing permits, roof readiness, electrical work, and system commissioning. Factors like roof type, shading, and local codes drive complexity. While DIY kits exist, professional installation ensures code compliance, warranty validity, and optimal performance. Plan for several hours to a few days depending on system size and site conditions.
Why This Is a Multistep Task
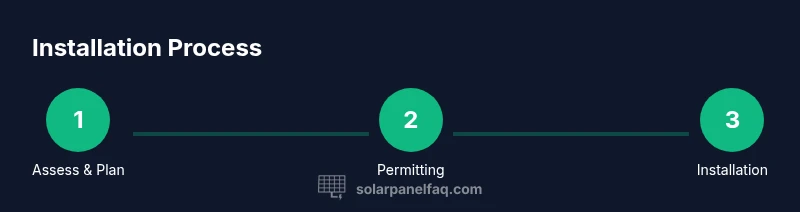
Installation of solar panels is a multi-stage project that requires careful planning and coordination. According to Solar Panel FAQ, most residential installs follow a repeatable sequence: site assessment, permits, mounting, electrical wiring, and commissioning. The roof must be evaluated for structure, condition, and load capacity; exposure to shade; and the presence of vents or chimneys. Safety is non-negotiable: working on rooftops and handling high-voltage DC circuits demands PPE, fall protection, and proper isolation. By understanding these requirements up front, homeowners can set realistic expectations and avoid costly rework. This is why many homeowners opt for professional help, especially in regions with complex permitting or strict electrical code requirements.
As you plan, remember that the difficulty isn’t just about you or your tools; it’s about coordinating multiple trades, inspections, and manufacturer warranties. Even small errors in mounting alignment or wiring can affect performance and roof integrity over time. A methodical approach minimizes risks and maximizes energy production from day one.
Key Factors That Influence Installation Difficulty
Several core factors determine how hard the installation will be:
- Roof type and condition: Pitched, flat, tile, or metal roofs each require different mounting methods and flashing details. A weakened roof shingle or tile increases complexity and safety concerns.
- Shading and orientation: Trees, chimneys, and nearby structures can reduce energy output if not accounted for in layout.
- System size and type of inverter: Larger systems with string inverters or microinverters demand more electrical planning and conduit routing.
- Electrical panel capacity: The main service panel must accommodate additional circuits; older homes may need panel upgrades.
- Permitting and inspections: Local rules vary; some areas require more documentation and multiple inspections, which can extend timelines.
- Accessibility: Attic space, crawl spaces, and roof access affect how easily equipment can be installed and inspected.
- Weather windows and safety: Timing installations around weather reduces risk for crew and materials.
Understanding these factors helps homeowners set realistic expectations and communicate clearly with installers, especially when comparing bids.
DIY vs. Professional Installation: Pros and Cons
- DIY pros: Lower upfront costs, educational value, hands-on learning. Benefits only if you have strong carpentry, electrical, and safety know-how.
- DIY cons: Higher risk of code violations, potential safety hazards, warranty voids, and longer project timelines if you’re learning on the job.
- Professional pros: Code-compliant installations, warranty coverage, optimized panel placement, and fewer delays due to permits. Pros coordinate inspections and ensure proper integration with the utility grid.
- Professional cons: Higher upfront cost and scheduling dependencies with the contractor.
Solar Panel FAQ emphasizes that for most homes, professional installation yields the safest, most reliable outcome and preserves warranty protections. If you value speed, safety, and long-term performance, a professional install is typically the better choice.
Typical Timeline and Phases
A residential solar installation unfolds in several phases. Site assessment determines roof suitability and shade analysis. Permitting follows, often involving utility interconnection agreements. Mounting and wiring precede the installation of modules and inverters. Commissioning and inspections come last, ensuring the system operates safely and as designed. While some homeowners complete simple setups in a day, adding permits and inspections can extend the timeline to several days. Solar Panel FAQ notes that project length varies with system complexity and local regulatory requirements.
During each phase, clear communication with the installer helps prevent scope creep and ensures all safety steps are met. Realistic expectations, combined with a documented plan, keep the project on track and reduce the chance of surprises when inspections occur.
How to Prepare Before a Quote
Before requesting bids, gather essential information to help installers provide accurate estimates. This includes your current electrical panel rating, existing roof condition, and an approximate solar energy usage profile. Compile roof measurements, shading observations, and any architectural constraints like vents or skylights. If you have existing warranties or prior roof work, collect related documentation. Create a few target configurations (system size, preferred inverter type, and potential warranty extensions) to enable apples-to-apples bids. This prep minimizes follow-up questions and speeds up the quoting process. Solar Panel FAQ recommends documenting site conditions and energy goals to align bids with actual needs.
What to Expect During Installation
On installation day, crews typically set up safety barriers and confirm electrical isolation. Mounting rails are attached first, followed by panel placement and wiring routing to the main service panel. Inverters and electrical disconnects are installed and tested with a basic commissioning check. Inspections are scheduled as required by local codes. Expect some roof access restrictions and minor noise; modern systems are designed to minimize disruption. The installer should provide a test report and system performance expectations after commissioning.
For homeowners, being present during critical steps (like final electrical connections) helps verify alignment with the approved plan and fosters confidence in the result.
Common Pitfalls and How to Avoid Them
- Underestimating roof condition: A weakened roof installation may require reinforcement; address this before mounting.
- Skipping shade analysis: Inadequate layout can dramatically reduce output; ensure layout accounts for seasonal sun path.
- Rushing the permitting process: Deadlines can delay interconnection; start early and keep communications open with your local authority.
- Neglecting warranty terms: Some manufacturers require professional installation for warranty validity; read the fine print.
- Improper wiring or grounding: This poses safety hazards and may trigger inspections failures; rely on licensed electricians for electrical connections.
Avoid these pitfalls by validating the plan with your installer, requesting a written scope of work, and obtaining multiple quotes that include permit costs and inspection fees.
Maintenance After Installation
Solar panels require minimal maintenance but benefit from periodic checks. Clean panels if they accumulate dust or debris in dry climates, and inspect mounting hardware for corrosion or looseness. Monitoring software can alert you to performance deviations, which may indicate shading changes or equipment faults. Schedule annual inspections to ensure wiring, conduit, and inverters remain within spec and that there are no physical obstructions or loose connections. Regular maintenance helps you sustain peak efficiency and a longer system life.
Next Steps: Getting a Quote and Moving Forward
Once you understand the installation landscape, contact multiple installers to compare bids. Ask for a detailed breakdown of permit costs, interconnection steps, and warranty terms. Verify that the installer is licensed and insured, and request a reference list with recent residential projects. A thorough evaluation helps you choose a partner who can deliver a safe, compliant, and high-performing solar system.
Tools & Materials
- Safety gear (gloves, goggles, hard hat)(PPE for roof work and electrical tasks.)
- Ladder and fall-protection gear(Stable access with harness if needed.)
- Drill/driver with assorted bits(For mounting hardware and electrical conduits.)
- Torque wrench(Proper torque for mounting rails and racking.)
- Measuring tape and marker(Accurate layout and alignment.)
- Solar mounting rails and racking kit(Roof-compatible mounting system.)
- Solar modules and inverter(Choose based on system design; inverters vary by type.)
- Conduit, junction boxes, and wiring(Electrical routing to service panel.)
- Electrical testing tools (multimeter, voltage tester)(Verify safety and proper wiring.)
- Sealing sealant/flashings(Waterproofing around roof penetrations.)
- Permitting documents and plans(Keep on-site for inspections.)
- Safety signage/barriers and first aid kit(Worksite safety essentials.)
Steps
Estimated time: Several hours to a day or more depending on size and site conditions.
- 1
Assess roof and electrical readiness
Evaluate roof condition, orientation, and shading. Inspect the electrical panel capacity and service disconnect location. This prepares the design and helps estimate permitting needs. A clear assessment reduces redesigns later and keeps the project on track.
Tip: Document roof age, material, and any prior repairs; this helps anticipate flashing and sealant requirements. - 2
Obtain permits and schedule inspections
Contact the local building department and utility for relevant permits and interconnection steps. Submitting the plan early minimizes delays and aligns with inspection windows. Schedule inspections to avoid backlogs that push the project timeline.
Tip: Ask for a permit checklist specific to solar installations in your jurisdiction. - 3
Choose mounting hardware and layout
Select a roof-friendly mounting system and design the array layout for sun exposure and spacing. Ensure clips, rails, and flashing match your roof type. Confirm module orientation to maximize performance.
Tip: Use a layout diagram or software to verify shade-free zones across seasonal sun paths. - 4
Route wiring to the service panel
Plan conduit routes from the roof to the main service panel with minimal bends. Install disconnects and conduit as required by code. Ensure proper grounding and safe separation from other circuits.
Tip: Turn off the main breaker before handling any wiring. - 5
Mount modules and connect electrical
Secure panels to rails and connect DC wiring to the combiner box, then route AC wiring to the inverter. Verify polarity and tighten all fasteners to spec. Keep a clean wiring path to reduce wear and weather exposure.
Tip: Double-check module orientation and seal all roof penetrations to prevent leaks. - 6
Commission and test the system
Power up the system and perform a commissioning test to verify output matches design. Record readings and ensure safety systems function (overcurrent protection, disconnects, grounding). Submit any required inspection documentation to authorities.
Tip: Have a licensed electrician review the final connections if you’re unsure.
Frequently Asked Questions
Do I need permits to install solar panels?
Most jurisdictions require permits for residential solar installations. Check with your local building department and utility for interconnection requirements. Operating without permits can lead to safety issues, code violations, and warranty problems.
Yes. Most places require permits; check with local building authorities and your utility for interconnection rules.
Can I install solar panels myself?
DIY installations are possible in some cases, but most homeowners should expect to hire a licensed contractor for safety, code compliance, and warranty protection. Complex electrical work and roof work increase risk.
DIY is possible but not generally recommended for safety and warranty reasons.
What roof types are compatible with solar panels?
Most common roof types can support solar panels, but mounting methods vary by roof material (shingle, tile, metal) and slope. A professional can confirm load requirements and seal flashing to prevent leaks.
Most roofs work, but talk to a pro about the best mounting method for yours.
How long does installation take?
Time varies with system size, permitting, and inspections. Many projects progress from design to commissioning within a few days, though some steps may extend the schedule.
Time depends on size and local permits; a few days is typical.
Will solar installation affect home insurance or value?
Solar installations can affect insurance premiums and home value, often positively. Check with your insurer and local market trends; warranties and proper interconnection influence outcomes.
Talk to your insurer and consider the local market impact before installation.
Do warranties require professional installation?
Many solar component warranties require professional installation to remain valid. Review the warranty terms for panels, inverters, and mounting hardware.
Warranties often require professional installation; read the terms carefully.
Watch Video
Top Takeaways
- Plan for a multi-step process with permits and inspections
- Professional installation improves safety and warranty validity
- Prepare site conditions and energy goals before bids
- Expect a variable timeline based on local regulations and roof type