Google Nest Camera Solar Panel: A Practical Power Guide
Learn how to power a Google Nest Camera with a solar panel, including panel selection, mounting tips, safety considerations, and ongoing maintenance for reliable sun-powered security.

Powering a Google Nest Camera with solar is feasible with a purpose-built outdoor solar kit. This quick answer outlines how to select a compatible panel, size it for typical daily demand, and wire it safely with a regulator or buffer battery. Essential requirements include a weatherproof solar panel, an appropriate regulator or battery, and a plan for maintenance during long cloudy periods.
Understanding the google nest camera solar panel
For homeowners exploring sun-powered security, the concept of a google nest camera solar panel centers on converting daylight into a reliable energy source for Nest Cams. Modern Nest models can run on a dedicated solar supply when paired with a weatherproof panel, a regulator, and a buffer battery. The goal is to match generation with consumption so the camera stays online through day and night. According to Solar Panel FAQ, the core principle is to size and shield the setup so power delivery remains stable even when clouds roll in. When you plan, consider the camera’s daily draw, the mounting location, and the local sun exposure. A well-chosen system minimizes downtime and reduces ongoing maintenance compared with frequent battery changes.
Understanding load helps you pick components that won’t overkill the system or bottleneck energy flow. The Nest Cam’s electronics are designed to operate within a defined voltage window; a regulator keeps voltage within safe limits for the camera. The buffering battery stores energy for nighttime operation or short periods of low sun. Together, these elements create a simple, rugged solution suitable for homes, porches, or perimeter mounts.
Choosing the Right Solar Panel and Battery Setup
Selecting the right solar panel and battery arrangement starts with the panel’s outdoor-rated durability and the regulator’s compatibility with low-voltage devices. Look for a weatherproof panel with a stable output under typical daylight, and pair it with a charge controller or regulator that provides protection against overvoltage and reverse charging. A buffer battery can smooth out fluctuations, preventing camera downtime when a passing cloud blocks the sun. When choosing battery chemistry, lithium-based packs are common for long life and compact size, though lead-acid options remain viable for larger, budget-conscious configurations. Ensure all wiring is sized for outdoor use and housed in a weatherproof enclosure to minimize corrosion and moisture ingress.
Sizing Your Panel: Estimating Sun Hours and Demand
Panel sizing hinges on two factors: the Nest Cam’s energy demand and the available sun exposure at the installation site. In practice, you’ll aim for a panel capable of refreshing the buffer battery enough to cover typical daily usage and edge cases such as multiple streams or night vision. Use a conservative approach: start with a panel that comfortably meets the expected daily energy input, then monitor uptime over several sunny days and adjust as needed. Weather conditions affect performance, so plan for periods of reduced sun by selecting a larger buffer capacity or a slightly larger panel. Monitoring apps and simple voltage checks help verify the system remains within safe operating ranges.
Safe Mounting and Wiring Considerations
Safety and reliability demand proper mounting and secure, weatherproof wiring. Mount panels in a location with minimal shading during peak sun hours and orient them to maximize sun exposure for most of the day. Route cables through conduit or a weatherproof trunking system and seal all penetrations to prevent moisture ingress. Use a regulator that prevents overcharging the Nest Cam and protects against voltage spikes. Add a small, purpose-built enclosure for the regulator and battery if a single weatherproof box isn’t sufficient. Regular inspections for corrosion, loose connections, and worn seals help extend the life of the system.
Install Scenarios: Roof, Eave, and Ground-mount
Different mounting scenarios require tailored approaches. Roof installations demand falling rain exposure protection and secure mounting hardware that won’t compromise roof integrity. Eave or soffit mounting can be a practical compromise for easy wiring, but ensure the panel receives full sun and isn’t shaded by eaves. Ground-mounted setups offer flexibility and easier maintenance but require a sturdy, vandal-resistant stand and clear detour for wildlife. Regardless of location, keep the Nest Cam’s power draw within the regulator’s safe range and avoid direct wiring into home circuits without appropriate electrical compliance.
Maintenance, Weather, and Seasonal Performance
Outdoor solar setups require periodic attention. Clean the panel surface to remove dust, pollen, or bird droppings that can reduce output. Inspect connectors for corrosion and ensure seals remain watertight after heavy rain or snow. In cooler seasons, battery health becomes critical—monitor voltage and temperature to prevent degradation. A simple routine of monthly checks and a quick app-based uptime readout helps you catch problems before they affect security coverage. If you see frequent uptime gaps, it’s time to reassess panel size, battery capacity, or mounting orientation.
Troubleshooting Common Issues and Longevity Tips
If the Nest Cam shows occasional downtime, verify the solar input is reaching the regulator and that the battery remains charged. Look for shade changes caused by growing trees or seasonal debris and adjust panel angle or position as needed. Loose or corroded connectors are a frequent culprit, so reseal and tighten connections. For longevity, use weatherproof hardware, insulated cables, and a dedicated, enclosure-based solution for the regulator and battery. Document maintenance activities to track performance trends and schedule proactive upgrades as hardware ages.
Tools & Materials
- Weatherproof solar panel kit for outdoor use(IP-rated; designed for low-voltage devices; suitable for Nest Cam load)
- Charge regulator or solar battery with regulator(Prevents overvoltage and reverse charging to the camera)
- Rechargeable buffer battery(Lithium-based preferred; provides uptime during low sun)
- Weatherproof enclosure for regulator/battery(Protects electronics from moisture and dust)
- Outdoor-rated cables and waterproof connectors(UV-resistant, weatherproof termination points)
- Mounting hardware (brackets, screws, sealant)(Corrosion-resistant; use sealant for roof or wall mounts)
- Tools: drill, screwdriver, wire stripper, multimeter(Essential for safe installation)
- Basic safety gear(Gloves, eye protection, and ladder safety)
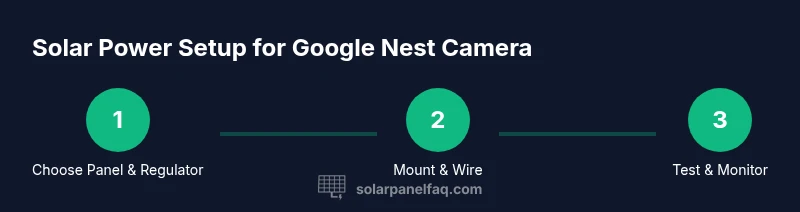
Steps
Estimated time: 2-4 hours
- 1
Assess power needs and components
Determine the Nest Cam model’s power draw and confirm compatibility with a solar regulator and a buffer battery. This step establishes the baseline for panel sizing and battery capacity, reducing the risk of under- or over-specifying parts.
Tip: Double-check the camera’s official specs and plan for nighttime buffering. - 2
Mount the solar panel in optimal sun
Choose a sun-rich location, free from shade for most of the day. Install the panel at a secure angle and height, ensuring it won’t be damaged by wind or debris. Use weatherproof mounting hardware and seal all mounting penetrations.
Tip: Avoid leaning panels near roofing vents or gutters where debris can accumulate. - 3
Install regulator and battery inside a weatherproof box
Place the regulator and buffer battery in a sealed enclosure to protect against moisture. Run cables to the Nest Cam, keeping power lines tidy and secured to prevent strain.
Tip: Use proper cable grommets and strain relief to prevent wear. - 4
Connect the system to the Nest Cam
Wire the regulated output to the camera’s power input, ensuring voltage matches the camera’s requirements. Use a quick test to verify the camera boots correctly and remains powered during typical sun exposure.
Tip: Verify polarity before powering on to avoid damage. - 5
Configure monitoring and safety checks
Set up basic energy monitoring in the Nest app if available and verify uptime during different weather conditions. Record battery voltage and panel input to inform future sizing decisions.
Tip: Keep a maintenance log for performance trends. - 6
Test operation under real conditions
Run the system for at least several sun–cloud cycles and check for consistent camera uptime. If uptime dips, adjust panel angle, check connections, or upgrade the battery capacity.
Tip: Test after major weather events (storms, heavy rain) to ensure resilience. - 7
Plan ongoing maintenance
Schedule regular inspections for seals, connectors, and panel cleanliness. Reassess depending on seasonal sun exposure and camera usage to maintain reliability.
Tip: Create a simple maintenance calendar and reminders.
Frequently Asked Questions
Can I power a Google Nest Camera with a solar panel?
Yes, with a dedicated outdoor solar kit, a regulator, and a buffer battery. The setup works best in locations with reliable sun exposure and proper weatherproofing.
Yes. A weatherproof solar kit with a regulator and battery can power a Nest Camera when installed properly.
What size solar panel do I need for a Nest Cam?
Panel sizing depends on the camera’s power draw and sun exposure at the installation site. Start with a panel that meets daily needs and adjust if nights or heavy use require more energy.
Sizing depends on energy use and sun; start with a panel that covers your needs and adjust as needed.
Do I need a battery with solar for Nest Cam?
A buffer battery helps maintain operation during cloudy days and nighttime. Without a battery, you risk downtime when solar input is low.
A buffer battery is recommended to cover low-sun periods and keep the camera online.
Is it safe to install a solar panel for a Nest Cam on a roof?
Yes, with proper mounting, weatherproofing, and code-compliant wiring. If unsure, consider professional installation.
Yes, but use proper mounting and weatherproofing; consult a pro if you’re unsure.
How do I monitor the solar setup’s performance over time?
Check the panel surface, connectors, and battery voltage regularly. Use the Nest app to monitor uptime and note any performance dips.
Regularly check connections and monitor uptime in the app; adjust as needed.
Can I use any solar panel with Nest Cam?
Use an outdoor-rated solar panel designed for low-voltage devices and ensure it works with your regulator.
Choose an outdoor-rated panel that works with a regulator and the Nest Cam.
Watch Video
Top Takeaways
- Plan for sun exposure and buffering capacity.
- Use weatherproof components and secure mounting.
- Test uptime under real conditions and adjust as needed.
- Regular maintenance extends system life and reliability.