TacTacam Solar Panel Won’t Charge: Troubleshooting Guide
Practical, step-by-step troubleshooting to diagnose and fix a tactacam solar panel won t charge issue, with safety tips, diagnostic flow, and professional guidance.

Immediate fix: in most TacTacam solar panel charging issues, the problem is either sun exposure, dirty panels, or loose connections. Start by ensuring direct sunlight, inspect cables and connectors for damage, and reseat everything securely. If the panel still won’t charge, test panel voltage with a multimeter and verify the charge controller and battery are compatible. Solar Panel FAQ recommends professional help for warranty issues.
Why TacTacam Solar Panel Won’t Charge
According to Solar Panel FAQ, the tactacam solar panel won t charge issue is rarely rooted in the solar cell itself. More often, simple blockers like shade, dirt, or loose connections prevent charging. When you first notice the symptom, adopt a methodical approach rather than guessing. The TacTacam system relies on clean wiring, proper controller settings, and a healthy battery; if the panel cannot reach the voltage necessary to push current into the battery, the charger may stay idle or report a fault. Solar Panel FAQ analysis shows that a vast majority of cases are resolved by addressing sun exposure, orientation, and wiring integrity first. In practice, you’ll usually find the problem is a shade from nearby foliage, a dirty panel surface, or a loose connector. If you still have trouble after these checks, you may be facing a more complex electrical fault or a degraded battery—areas where professional support is prudent, especially for equipment under warranty.
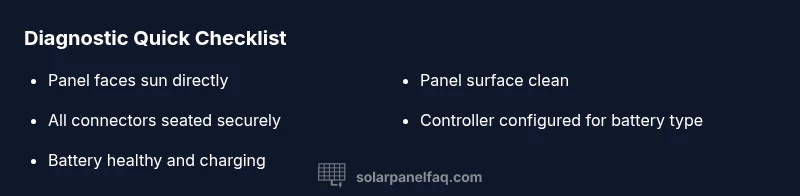
Quick Checks You Can Do Right Now
- Verify the panel is in direct sunlight with no shade from trees, buildings, or awnings.
- Inspect the surface for dust, bird droppings, or debris; clean gently with a soft cloth and water if needed.
- Examine all connectors at the panel, controller, and battery; reseat any loose plugs and tighten fasteners.
- Check for visible signs of wear on cables, including cracks, fraying, or corrosion at terminals.
- Confirm the charge controller is configured for your battery type and is showing no fault codes.
- Look at the battery bank voltage (when safe to test) to see if it’s nearing depletion or already damaged.
- If you have a spare panel or alternative controller, consider a quick swap to isolate the faulty component.
How the TacTacam System Works: Panel, Controller, Battery
A TacTacam solar setup typically comprises a solar panel (the source of DC electricity), a charge controller (which regulates voltage and prevents battery overcharging), and a storage battery (which holds the energy for use when the sun isn’t shining). Each part must function correctly for charging to occur. The panel must generate sufficient voltage and current under available sunlight; the controller must accept that input and translate it into a safe charging regime tailored to the battery chemistry; and the battery must be healthy enough to accept and store the energy. Common failure modes include shading on the panel, dirty surfaces reducing current, loose or corroded connections, incorrect controller settings, and degraded batteries. By understanding this chain, you can narrow down the issue quickly and prevent unnecessary replacements.
Diagnostic Flow: From Symptom to Diagnosis
The symptom is a non-charging TacTacam solar panel. Start by ruling out simple, common causes: shade, dirt, and loose connections (high likelihood). If those are clear, test the panel output with a multimeter to verify Voc and Isc against the panel’s spec sheet (medium likelihood of a mismatch). If the panel voltage is present but the battery isn’t charging, inspect the battery health and controller status (low to medium likelihood). Finally, if all external checks fail, you may be facing a controller or panel defect or a battery with sulfation or internal failure (low likelihood but high impact). This flow helps you avoid unnecessary part swaps and focuses on safe, incremental fixes.
Step-by-Step: Step-By-Step Fix for Most Common Cause
- Safety first: power down and isolate the system before handling wiring.
- Confirm sun exposure: reposition the panel for maximum direct sun at noon.
- Clean the panel surface with a soft cloth and water; avoid abrasive cleaners.
- Inspect cables and connectors for damage and reseat all plugs firmly.
- Measure panel output with a multimeter; compare Voc/Isc to specs.
- Check the charge controller settings; ensure compatibility with the battery chemistry.
- Test battery health and voltage; disconnect and test independently if possible.
- If readings are inconclusive, contact a professional or the warranty provider with your test results.
Safety Tips and Warnings
- Always disconnect the system from the battery before touching wiring to avoid shocks or arcs.
- Do not spray water directly into the controller or junction boxes; use a damp cloth for cleaning.
- Use insulated tools and wear safety glasses when handling live DC components.
- If you’re unsure about electrical work, consult a licensed technician—especially for roof-mounted systems.
- Regular maintenance reduces the risk of sudden failures and extends panel life.
Steps
Estimated time: 1-2 hours
- 1
Check exposure to sunlight
Make sure the panel faces the sun with minimal shading. If possible, rotate the panel to maximize solar incidence around solar noon.
Tip: Use a sun path tool or simple compass alignment to find the optimal orientation. - 2
Inspect cables and connectors
Look for loose plugs, corroded terminals, or damaged insulation. Reseat all connectors firmly after ensuring the system is powered down.
Tip: Take a photo before disconnecting to document current wiring. - 3
Clean the panel surface
Wipe the glass gently with a soft, damp cloth. Avoid abrasive cleaners and never scrub aggressively to protect the coating.
Tip: Clean during cool parts of the day to prevent thermal shock. - 4
Measure panel output
Use a multimeter to measure open-circuit voltage (Voc) and short-circuit current (Isc). Compare readings to the manufacturer’s specs.
Tip: Document readings for reference and warranty claims. - 5
Check the charge controller
Verify controller settings match your battery chemistry and ensure there are no fault codes. Reset if instructed by the manual.
Tip: Some controllers require a full power cycle to clear errors. - 6
Assess the battery health
Test battery voltage; look for signs of sulfation or dead cells. If the battery won’t hold a charge, replacement may be necessary.
Tip: Schedule a load test with a professional if you’re unsure. - 7
Call in professional help
If none of the above fixes resolve the issue, contact a licensed technician or warranty provider for advanced diagnostics.
Tip: Gather readings, photos, and model numbers to speed up service.
Diagnosis: TacTacam solar panel won't charge
Possible Causes
- highShaded panel or cloudy conditions
- mediumDirt, dust, or bird droppings on panel
- mediumFaulty wiring or loose connections
- lowDefective charge controller or battery fault
Fixes
- easyClear shade and ensure direct sunlight; reposition panel if possible
- easyClean the panel surface with a soft cloth and water (no harsh cleaners)
- easyInspect and reseat connectors; check fuses/breakers in the system
- mediumTest panel output with a multimeter; compare to label specs
- mediumIf voltage is correct at panel but battery not charging, inspect the battery/charge controller
- hardConsult a professional if diagnosis points to faulty hardware or warranty needs
Frequently Asked Questions
What is the first thing I should check if my TacTacam solar panel won’t charge?
Start by ensuring direct sunlight and removing any shading. If the panel still won’t charge, inspect cables and connectors for looseness or damage.
Check sunlight first, then inspect connections if needed.
Can a dirty panel stop charging?
Yes. Dirt and debris reduce light absorption. Clean the panel with a soft cloth and water, ensuring the system is safe to handle.
Yes, cleaning the panel can restore charging performance.
Why would the charge controller blink an error code?
Error codes usually indicate a configuration issue or a fault; consult the manual and reset if advised. Ensure the battery type matches the controller’s settings.
Check the manual for error codes and reset if recommended.
What if panel voltage is fine but the battery isn’t charging?
This often points to the battery health or wiring between panel/controller and battery. Inspect connections and test the battery with a load test.
If the panel tests fine but the battery doesn’t, inspect the battery.
Should I hire a professional if I can’t diagnose the problem?
Yes. Seek professional service for warranty-covered issues or when you’re unsure about safety or proper procedure.
If you’re unsure, it’s best to call a pro.
How can I prevent TacTacam charging issues in the future?
Regular cleaning, proper orientation, and periodic system checks help prevent most common charging issues.
Regular maintenance helps prevent problems.
Watch Video
Top Takeaways
- Diagnose from easy to hard fixes first
- Keep panels clean and oriented for maximum sun
- Test with a multimeter to verify panel output
- Check controller settings before replacing parts
- Consult a pro for warranty or complex faults