Repair a Solar Panel: Safe, Practical Home Guide 2026
Learn how to assess and perform safe, non-invasive maintenance on solar panels, understand when to call a professional, and protect warranties with clear steps, safety checks, and expert guidance from Solar Panel FAQ.

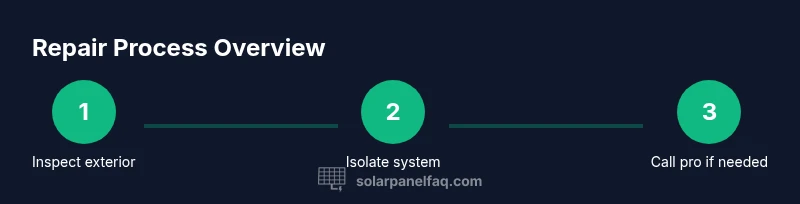
Repairing a solar panel is not a typical DIY task due to electrical hazards and warranty implications. This guide helps homeowners decide when basic maintenance is enough, what safe checks you can perform, and when to hire a licensed technician for actual repairs. Expect emphasis on safety, non-invasive fixes, and clear next steps.
Why repairing a solar panel is different from replacing
Repairing a solar panel is not like replacing a broken appliance. Solar panels are part of a live, high-voltage system with sealed modules, junction boxes, and sometimes microinverters. Repairs often involve sensitive electrical components or structural integrity that, if mishandled, can create fire or shock hazards. The Solar Panel FAQ team emphasizes that many issues are best addressed by professional technicians who understand wiring diagrams, safety protocols, and warranties. This section outlines the core differences between DIY-friendly maintenance and professional repairs, and why context matters—cracks in glass versus damaged bypass diodes have very different implications for safety and performance. By understanding these distinctions, homeowners can make informed decisions and protect their investment.
Safety first: when to stop and call a pro
Electrical work on solar systems carries real risks. If you notice exposed conductors, burning smells, water exposure, or signs of arcing, stop immediately and shut down the system at the main disconnect. Do not touch cables, seals, or junction boxes beyond any obvious exterior damage. The Solar Panel FAQ team recommends engaging a licensed electrician or certified solar technician for any repair that involves wiring, modules, or roof penetrations. Prioritize safety over saving money, and document what you see to share with a pro. Remember that improper repairs can void warranties and compromise system performance.
Basic non-invasive maintenance you can perform safely
There are safe, non-invasive tasks homeowners can perform to protect performance and extend life, without opening panels. Start with a visual inspection from the ground or a balcony: look for loose mounting hardware, cracked frames, moisture around seals, or panel alignment issues. Gently clean surface dust with a soft brush or microfiber cloth, avoiding harsh chemicals. Ensure the DC wiring or conduits are intact, but only touch them if you are trained and the system is fully de-energized at the main disconnect. Keeping a maintenance log with dates, weather conditions, and visible concerns helps a pro diagnose later.
How to diagnose issues without opening modules
Before any disassembly, document output trends using the system monitor or inverter display. Look for sudden drops in current or voltage, flickering indicators, or optimizer/inverter fault codes. Do not perform invasive tests inside sealed enclosures. If you observe consistent performance dips, contact a licensed professional who can perform non-destructive tests (e.g., infrared thermography, insulation resistance checks) safely and within warranty terms. Use a notebook to track weather, shading changes, and cleaning history to help with diagnosis.
What a professional repair involves
A professional repair typically begins with a thorough site assessment, including inspection of mounting hardware, wiring, connectors, and the inverter system. Diagnostics may require safe access to rooftops, energized conductors, and sometimes module replacement. Reputable technicians will verify warranty status, source genuine replacement parts, and perform testing to confirm restoration of expected output. They will also provide a written report detailing root causes, corrective actions, and preventive recommendations to reduce recurrence. Expect costs to reflect parts, labor, and potential access needs (roof work, scaffold, or temporary power shutoffs).
Warranty, guarantees, and choosing a qualified technician
Repair decisions should align with warranty coverage and manufacturer recommendations. Review your solar panel and inverter warranties to understand what is covered and for how long. When selecting a technician, prioritize certifications (e.g., NABCEP or equivalent), documented experience with your panel/ inverter brands, and clear written estimates. Ask about part sourcing, part warranty, and post-repair testing. A reputable pro will explain risks, provide a timeline, and avoid upselling non-essential fixes. Keeping communications transparent protects your investment and ensures accountability.
Tools & Materials
- Safety gear (gloves, goggles, non-slip shoes)(ANSI Z87.1 rated eye protection; non-slip gloves)
- Insulated voltage tester or multimeter(Used only after system is isolated; verify no residual voltage)
- Non-conductive tool set(Plastic or fiberglass tools for handling connectors)
- Soft brush or microfiber cloth(Gentle cleaning for panel surfaces; avoid abrasive cleaners)
- Replacement parts as advised by pro(Only after professional evaluation and confirmation)
- Ladder or roof access aid (if allowed)(Use only with proper fall protection and adherence to local codes)
Steps
Estimated time: Estimated total time: 60-120 minutes for inspection, documentation, and initial checks; additional time may be required for professional assessment and repair.
- 1
Power down and isolate the system
Begin by locating the main service disconnect and turning the system off. Confirm there is no residual voltage using a multimeter if you are trained. This step is essential to prevent electric shock and protect other components during any inspection.
Tip: If you are unsure how to safely disconnect, stop and consult a professional before continuing. - 2
Inspect from ground for obvious damage
Visually inspect mounting hardware, frames, and seals from ground level. Look for loose rails, visible cracks, or signs of water intrusion near junction boxes. Document any exterior damage with photos for later reference.
Tip: Take wide-angle photos to show roof access or elevated areas; this helps a pro assess access needs. - 3
Document conditions and gather information
Record model numbers, serials, inverter types, and any fault codes shown on the monitor. Note weather conditions and recent cleaning or shading changes. A detailed log helps a technician diagnose quickly and accurately.
Tip: Keep a copy of your warranty documents handy; some repairs may be covered or require pre-authorization. - 4
Check accessible connections safely
If you have been trained, inspect accessible DC connectors for corrosion or loose fittings. Do not pry or open sealed modules. Only perform this step after isolation and with non-conductive tools.
Tip: Never touch live wires or open a module; this can cause permanent damage or injury. - 5
Decide on professional depth of diagnosis
If non-invasive checks don’t reveal the issue, plan a professional assessment. A licensed technician may perform infrared imaging, insulation tests, or controlled tests to identify internal faults without compromising safety.
Tip: Document the issues you’ve observed so the pro can plan targeted tests. - 6
Review warranty implications before proceeding
Check warranty terms to determine whether any repairs could void coverage. Discuss with the tech how the repair will affect warranty eligibility and future service.
Tip: Ask for a written warranty on any replacement parts or repaired components. - 7
Post-repair verification and monitoring
After repairs, verify output with the monitoring system and re-check that all safety devices are operational. Schedule a follow-up check to ensure the system remains stable over time.
Tip: Record post-repair readings and compare them to baseline values.
Frequently Asked Questions
Can I repair a solar panel myself?
Most repairs beyond basic cleaning require a licensed professional. You can perform safe, non-invasive checks, but avoid opening sealed modules or handling energized components.
DIY repair is generally not advised for most solar panels. Safe, non-invasive checks are possible, but professional service is recommended for anything beyond cleaning.
What are signs a panel is damaged?
Visible cracks, moisture or corrosion around connections, discoloration, or sudden drops in output indicate potential damage. If you notice these, consult a professional.
Cracks, moisture around wiring, or sudden output drops are signs you should get a professional assessment.
Does repairing a panel affect warranty?
Warranty terms vary by manufacturer. Verify coverage before any repair and document all work to maintain eligibility. A pro can guide you on warranty implications.
Warranty terms vary; check coverage and keep records. A professional can advise on warranty implications before any repair.
How long does a typical panel repair take?
Repair duration depends on the issue and parts availability. Minor maintenance can be quick, while complex repairs may require parts orders and scheduling.
It varies; some repairs are quick, others need parts and scheduling, so timelines differ.
Should I use heat for fixes on panels?
No. Applying heat or force can damage laminates and seals. Rely on professional assessments and approved replacement parts instead.
Avoid heat and force. Rely on professional evaluation and approved parts.
What should I ask a technician before hiring?
Ask about certifications, experience with your panel brand, warranty on parts, estimated costs, and a written scope of work.
Ask about certification, brand experience, part warranties, cost estimates, and a written plan.
Watch Video
Top Takeaways
- Know when to DIY versus when to hire a pro
- Always isolate the system before any inspection
- Document issues thoroughly for accurate diagnostics
- Protect warranties by following manufacturer guidance