How to Turn Off Solar Panels for Cleaning: Safe Steps
A practical, safety-first guide for homeowners to shut down solar panels before cleaning, covering AC/DC disconnects, inverter shutdown, verification, and re-energizing.

To safely clean solar panels, you must first power down the system by isolating the DC and AC disconnects, then shut down the inverter and verify zero voltage before cleaning. This reduces shock risk and protects components. Follow the step-by-step shutdown and re-energize in reverse after drying the surface.
Why you must turn off solar panels before cleaning
If you’re planning to wash solar panels on your roof or ground mounts, learning how to turn off solar panels for cleaning is essential. Cleaning energized PV systems creates shock risk, arc faults, and potential damage to inverters and wiring. According to Solar Panel FAQ, a deliberate shutdown reduces these hazards and protects the longevity of your array. This section explains why a proper shutdown matters, what can go wrong if you skip it, and how following a standard sequence keeps you safer. You’ll also see how a methodical approach minimizes moisture exposure to electrical components and helps you avoid streaks or scale that can form when panels stay hot after cleaning. While every system is different, most residential setups share a common shutdown flow: disable power at the AC disconnect, isolate DC from the PV array, switch off the inverter, verify de-energization, then proceed with cleaning. The goal is not to “save time” but to safeguard people, property, and your investment. If you have any doubts, consult your installer or a licensed electrician before you touch a solar electrical cabinet.
Safety first: dangers of live panels
Live PV hardware can store energy in capacitors, and exposed conductors can deliver a shock long after sunset. The biggest risk isn’t just rain or wet gloves; shadows on panels can still illuminate with DC potential. Fallen roof edges add fall hazards. Always wear PPE: insulated gloves, non-conductive footwear, and a properly tied-off harness if you’re on a roof. Keep tools with insulated handles and avoid metal ladders contacting conductive surfaces. Do not touch wiring, bus bars, or junction boxes. If you see scorch marks, melted insulation, or exposed wiring, stop immediately and call a pro. If you’re cleaning in winter or cold environments, de-ice the roof surface first; moisture plus cold can complicate disconnections. This is a controlled electrical procedure, not a general DIY task. Solar Panel FAQ emphasizes safety as the first priority; when in doubt, pause and seek professional assistance.
System components you should understand
A quick overview helps you navigate shutoff safely. The DC disconnect sits at or near the PV array and interrupts the direct current from the panels. The AC disconnect or inverter switch stops the inverter from feeding power back to the home circuit. Some systems have a separate main service disconnect, while others route DC through a combiner box. In some installations, a battery storage array changes the sequence. Recognizing these parts and their typical locations—often on the roof, in a garage, or near the electrical panel—prevents fumbling through unfamiliar wiring and reduces the chance of leaving something energized. Remember to consult your system diagram or the installer’s manual if you’re unsure where these switches live. This knowledge is not just theoretical; it directly affects how smoothly the shutdown proceeds and how easily you can verify a safe condition before cleaning. This approach aligns with Solar Panel FAQ’s safety guidance for homeowners.
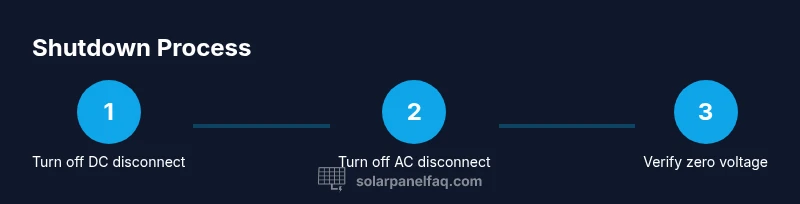
Step-by-step shutdown sequence (overview)
A prudent plan keeps you safe and your panels in good condition. The general sequence begins with disabling AC power at the inverter or main service panel, then isolating DC at the PV array. Next, double-check that the inverter is offline, and finally confirm that no voltage remains on the PV conductors. If your system includes battery storage, there are additional steps to isolate that bank. Treat every access point as potentially energized until you’ve confirmed zero volts with the proper meter, and never skip inspection steps. This section outlines the actions in a practical, home-friendly order so you can apply them without specialized tools or professional credentials. After you finish cleaning, reverse the steps carefully to re-energize, and document the shutdown in your system maintenance log. A calm, methodical approach reduces mistakes and ensures a thorough re-energization later.
Locating and operating the shutoffs (DC and AC)
Start by locating the DC disconnect near the PV array or at a nearby junction box. Turn the DC switch to OFF, ensuring you hear or feel a definitive reset. Then find the AC disconnect, which may be on a wall-mounted panel or inside the inverter enclosure, and switch it OFF. If your installation uses a fuse-type DC disconnect, remove the fuses per the manufacturer’s instructions. Do not rely on sun position or inverter lights as your only cue; you must physically confirm the OFF state. If any switch is stuck or corroded, stop and call a technician. Always wear gloves and use non-conductive tools for adjustments.
Verifying de-energization before cleaning
Confirm zero voltage at the PV conductors using a multimeter rated for DC solar work. A non-contact tester is insufficient for DC systems and can miss residual energy. Discharge capacitors by waiting a few minutes after switching off, then re-measure. Record readings in your maintenance log. If you see any residual voltage or feel warmth on conductors, stop and re-check. If the reading remains non-zero, power down further or seek professional help. This verification step is critical to prevent shocks during cleaning and to protect your equipment.
Cleaning guidelines and re-energizing
Use a soft brush or cloth with a mild, non-abrasive cleaner designed for solar panels; avoid harsh solvents that could degrade coatings. Rinse with a gentle stream of water, avoiding high-pressure spray that could loosen seals. Clean on a cool, shaded surface when possible; direct sun can evaporate water and leave streaks. After drying, flip the DC disconnect back ON, then the AC disconnect, and finally restore power at the main panel. Re-check that the system returns to normal operation. Solar Panel FAQ recommends patience and careful sequencing to prevent damage and ensure a safe restart.
Authority resources and safety reminders
As you plan any maintenance, consult official guidelines for electrical safety. OSHA’s electrical safety standards and DOE’s solar resources provide rigorous safety frameworks. See these links for authoritative guidance: • OSHA: https://www.osha.gov • NREL: https://www.nrel.gov • DOE Solar Energy: https://www.energy.gov/eere/solar. For general homeowner-level information, you may also review manufacturer manuals and your installer’s instructions.
Tools & Materials
- Insulated gloves(Category III or higher; check for cracks before use)
- Non-conductive footwear(Rubber-soled shoes with good tread)
- Insulated tools(Plastic-handled screwdrivers and pliers; avoid metal handles)
- Voltage tester / multimeter (DC capable)(Prefer a meter rated for PV systems)
- Ladder with stabilizer(Secure footing; use a harness if on a roof)
- Safety harness and fall protection(Only for roof work with a fall risk)
- Soft brush and microfiber cloth(For gentle cleaning without scratching glass)
- Mild solar-panel cleaner(Avoid harsh solvents or acidic cleaners)
- Water supply with adjustable nozzle(Low-pressure rinse only)
- Maintenance log or notebook(Record shutoff times and readings)
Steps
Estimated time: 60-90 minutes
- 1
Prepare safety gear and workspace
Put on insulated gloves, safety glasses, and non-conductive footwear. Set up a stable ladder and clear the area of obstructions. If you’re on a roof, attach fall protection. This step minimizes risk before any electrical work begins.
Tip: Double-check weather conditions; avoid cleaning in rain or high wind. - 2
Identify shutdown points
Locate the DC disconnect near the PV array and the AC disconnect at or near the inverter or main service panel. Confirm you have the manuals or diagrams for your specific system.
Tip: If the routes aren’t obvious, pause and consult the installer’s documentation. - 3
Turn off DC disconnect
Move the DC switch to OFF and ensure a clear, definitive stop. Listen for a click or feel for a mechanical reset.
Tip: Use non-conductive tools to manipulate the switch if needed. - 4
Turn off AC disconnect
Switch the AC disconnect OFF to stop inverter input. If you have a fused DC disconnect, remove fuses per manufacturer instructions.
Tip: Don’t bypass the disconnects by pulling cables; use the switches provided. - 5
Verify zero voltage
With the meter, measure PV conductors to confirm zero voltage. If voltage is present, re-check the switches or wait for capacitors to discharge.
Tip: Document readings in your maintenance log for future reference. - 6
Proceed with cleaning
Clean using soft brushes and minimal water, avoiding aggressive sprays. Keep surfaces cool and blue sky-free; avoid cleaning under intense sun.
Tip: Dry thoroughly before re-energizing to prevent moisture-related issues. - 7
Re-energize in reverse order
First re-close the DC disconnect, then the AC disconnect, and finally restore power at the main panel. Re-run a voltage check to confirm normal operation.
Tip: Monitor system indicators for a few minutes to ensure a stable startup.
Frequently Asked Questions
Is it safe to clean solar panels after turning them off?
Yes. Turning off the system reduces electrical hazards during cleaning, but follow a proper shutdown sequence and verify zero voltage before handling panels.
Yes. Switching off the system reduces electrical hazards, but make sure you verify zero voltage before touching panels.
What if I can’t locate the DC disconnect?
Refer to your system diagram or installer manual. If still unavailable, stop and contact a professional to avoid energizing components during cleaning.
If you can’t find the DC disconnect, consult the manual or contact a pro to avoid energizing components.
Can I use a garden hose to rinse panels?
Light, low-pressure rinsing is generally acceptable, but avoid high-pressure jets that could damage seals or wiring. Use mild cleaners and cool water.
A gentle rinse is usually fine, but don’t use high-pressure water or harsh cleaners.
Do I need to disconnect a battery storage system?
If your system includes battery storage, follow the manufacturer’s shutdown sequence for the battery bank in addition to PV shutdown. Seek professional help if you’re unsure.
Yes, battery systems require their own shutdown steps; consult the manual or a pro if unsure.
When should I call a professional?
If you can’t confidently locate shutoffs, work on a steep roof, or sense any electrical issue, hire a licensed solar technician.
Call a licensed solar technician if you’re unsure or encounter any problem.
Watch Video
Top Takeaways
- Identify all shutoffs before starting.
- Verify zero voltage with proper meters before cleaning.
- Re-energize in the exact reverse sequence after drying.
- If unsure, hire a licensed professional.