How to Prevent Solar Panel Fire: A Homeowner's Safety Guide
Practical, code-compliant steps homeowners can take to prevent solar panel fires, from design basics to maintenance and emergency actions. Learn to inspect, upgrade, and monitor your system for safer solar power in your home.

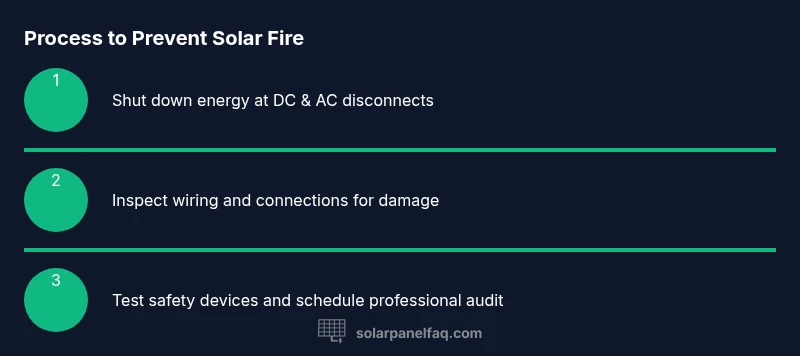
Follow these steps to prevent solar panel fires: choose code-compliant components (modules, inverters, combiner boxes) rated for outdoor use; size wiring and conduit correctly; install arc-fault/rapid-shutdown devices; perform regular inspections for damaged insulation, loose connectors, and overheating; keep panels and equipment clear of debris; schedule annual professional inspections and prompt repairs as needed.
Understanding Fire Risks in Solar Installations
Solar systems present fire risks primarily from electrical faults, overheating, and improper installation. According to Solar Panel FAQ, most residential fire incidents trace back to damaged wiring, degraded insulation, or loose connections that create arcing heat. This section explains how fires originate across the PV system—from modules and mounting hardware to inverters and DC conductors—so homeowners know what to inspect and monitor for safety.
Key risk factors include:
- Damaged or frayed DC wiring near the combiner boxes
- Overheating modules due to shading, soiling, or microcracks
- Loose terminations at junction boxes or lugs
- Inverter faults or improper grounding
The consequences can be severe when flammable roof materials or dry environments are present. Regular attention to indicators of wear and aging reduces risk and helps prevent fires before they start.
Key Safety Standards and Codes
Fire safety in solar installations is guided by national and local electrical codes. The NEC (National Electrical Code) outlines requirements for protective devices, proper disconnects, and clearances, while many jurisdictions adopt rapid shutdown provisions to limit energy exposure during emergencies. Local amendments may add or modify requirements; always verify with a licensed electrician or solar contractor. Solar Panel FAQ analysis shows that adherence to these standards correlates with lower incident risk and simplifies post-installation inspections.
Core code elements to discuss with your installer include:
- Existence and accessibility of a DC disconnect
- Use of listed, weatherproof enclosures and rated conduit
- Correct labeling and documentation for service personnel
Preventive Design Choices
Proactive design choices can dramatically reduce fire risk. Select modules and inverters that are UL-listed or ETL-listed for outdoor use, with robust junction boxes and flame-resistant mounting hardware. Plan for adequate spacing between components to avoid heat buildup, and use protective conduits to shield DC wiring from sun, moisture, and physical damage. Consider integrated safety features such as rapid shutdown modules and arc-fault protection as standard parts of the system. Solar Panel FAQ emphasizes that starting with a safer design pays dividends in maintenance and peace of mind.
Proper Wiring and Component Sizing
Wiring is the nervous system of a solar array; wrong sizing can overheat, degrade insulation, and create fire risk. Ensure conductors are sized for expected current and temperature, with proper insulation rated for outdoor use. Use listed connectors and torque each lug to the manufacturer's specification to prevent loose terminations. Route cables in dedicated conduits and avoid sharp bends, which can damage insulation over time. Solar Panel FAQ notes that consistent, manufacturer-approved wiring practices are a key defense against fires.
Combiner Boxes, Junction Boxes, and Fire Safety Clearances
Combiner and junction boxes concentrate circuit connections; they must be accessible, properly labeled, and protected from the elements. Maintain clearances from vents, chimneys, and flammable materials, and use fire-rated enclosures with appropriate gaskets and seals. Install protective barriers to prevent physical damage from branches, hail, or foot traffic. Regularly inspect box covers, seals, and cable clamps to ensure there are no openings that could ignite surrounding materials.
Regular Maintenance and Inspections
A routine inspection schedule is essential for early fire detection. Perform a visual check monthly for discoloration, burnt smells, or melted insulation. Conduct a more thorough inspection quarterly or annually with a qualified professional, including infrared thermography to spot hotspots that aren’t visible to the naked eye. Clean panels to remove dust and debris that can mask hotspots, but never use high-pressure water on electrical components. Maintain a detailed log of findings and actions taken.
Monitoring and Hotspot Detection Technologies
Advances in monitoring platforms and thermal imaging help detect early warning signs of overheating. Many systems include real-time performance dashboards and alerts for voltage or temperature anomalies. Infrared cameras or thermal sensors can pinpoint hotspots across modules, junction boxes, and cabling. Linking monitoring data to your maintenance calendar makes it easier to schedule targeted inspections before a fault develops into a fire risk.
Responding to Fire Hazards: What to Do
If you notice signs of overheating or smell burning, prioritize safety. If safe to do so, shut down the system at the main DC disconnect and then the AC service disconnect to reduce energy present in the array. Do not touch exposed wiring or attempt repairs yourself. Call emergency services if fire is visible, and evacuate as needed. A licensed electrician or solar technician should conduct a post-event assessment and repairs before returning the system to service.
Quick-start Safety Checklist for Homeowners
A proactive homeowner can dramatically lower fire risk by following a simple, repeatable routine. Start with a monthly visual inspection of all DC wiring, junction boxes, conduits, and inverter connections for signs of wear, scorching, or corrosion. Verify that the DC disconnect is accessible, labeled, and free from obstructions, and confirm that the AC disconnect is clearly marked as the service point for emergencies. Keep the solar array area clean—remove leaves, branches, and other debris that could trap heat or ignite.
Additionally, schedule professional assessments at least once a year. Ask your installer to perform infrared thermography to detect hidden hotspots and to review wiring, insulation, and protection devices for proper operation. Maintain a written maintenance log with dates, findings, and remediation steps. If you plan to rent or move, share this safety record with the new owner or property manager to ensure ongoing vigilance.
Tools & Materials
- Digital multimeter(For voltage, continuity, and insulation checks)
- Voltage detector(Non-contact tool to verify absence of live energy)
- DC-rated insulated gloves(Protection when handling DC conductors)
- Torque screwdriver(Ensures lugs are torqued to manufacturer spec)
- Infrared thermal camera(Optional for hotspot detection)
- Safety glasses(Eye protection during inspection)
- Labeling tape and marker(Clear labeling of disconnects and panels)
- Personal protective equipment (PPE)(Hard hat, flame-resistant clothing as appropriate)
- Fire extinguisher (Class C/ABC)(Only for qualified users and emergencies)
Steps
Estimated time: Total estimated time: 2-4 hours for initial inspection; monthly checks take 15-30 minutes. Thermography or a full professional audit may require additional time.
- 1
Shut down the solar system
Begin by turning off the system at the main DC disconnect, then the AC service disconnect to ensure there is no live energy in the array. This reduces the risk of electric shock while you inspect wiring, modules, and equipment. Before touching anything, verify with a voltage detector that the lines are de-energized.
Tip: Lockout/tagout procedures, if available, prevent accidental re-energization. - 2
Inspect for visible damage
Look for damaged insulation, scorch marks, melted areas, or corrosion on all accessible wiring, conduits, and junction boxes. Pay close attention to DC wiring near combiner boxes and module edges where heat tends to accumulate. Document any abnormalities for follow-up.
Tip: Use a thermal camera if available to catch hotspots not visible to the eye. - 3
Check connections and torque
Tighten loose lugs and tighten connections to the manufacturer’s torque specification. Loose terminations are a frequent fire risk source. Re-seat connectors and inspect for signs of arcing or corrosion at terminations.
Tip: Do not over-tighten; excessive torque can damage terminals. - 4
Verify conductor sizing and routing
Confirm conductors are sized for the expected current and temperature, and that insulation is rated for outdoor exposure. Route cables in protected conduits with minimal bending to prevent insulation wear over time.
Tip: Avoid sharp bends and keep cables away from heat sources. - 5
Test safety devices
Test rapid shutdown or AFCI devices and the DC disconnect for proper operation. Ensuring these protections work can dramatically reduce energy exposure during an emergency.
Tip: Follow the manufacturer’s testing procedure and document results. - 6
Clean and reseal panels
Clean panels of dust and debris to prevent heat buildup, ensuring seals around enclosures remain intact. Do not spray water directly on electrical components.
Tip: If you must clean, use a soft brush or damp cloth and avoid high-pressure water. - 7
Schedule a professional inspection
Arrange a visit from a licensed electrician or solar installer for a formal assessment, including thermography and code compliance review. A professional can identify hidden issues that DIY checks may miss.
Tip: Ask for a written report and remediation plan. - 8
Document findings and set reminders
Maintain a maintenance log with dates, observations, and actions taken. Set calendar reminders for future inspections and thermography to maintain ongoing safety.
Tip: Share the log with any future property owner or new installer.
Frequently Asked Questions
What is the leading cause of solar panel fires?
Electrical faults and improper installation are common contributors. Regular inspections and proper wiring practices greatly reduce this risk.
Electrical faults and improper installation are the leading causes; regular checks and correct wiring reduce that risk.
Do all residential solar systems require AFCI protection?
AFCI requirements vary by local code. Check with a licensed electrician to ensure your system complies where you live.
AFCI requirements depend on your local code; consult a licensed electrician to confirm.
Can cleaning panels prevent fires?
Cleaning panels helps maintain efficiency and reduces overheating from debris, but cleaning should be done safely and without wetting electrical components.
Cleaning helps prevent overheating due to debris, but avoid wet conditions near electrical parts.
How often should a professional inspect a solar system?
Most experts recommend at least once a year, with thermography or additional checks every few years based on risk.
Typically, an annual professional inspection is advised, with thermography every so often as needed.
What should I do if I notice scorching or burning smells?
Shut down the system at the DC disconnect if safe, then at the AC disconnect, call emergency services if there is a fire, and have a professional assess.
If you smell burning, shut down the system safely if you can, call emergency services if needed, then call a professional.
Is fire risk higher with roof leaks?
A roof leak can worsen fire risk by bringing moisture into electrical paths and corroding components; address leaks promptly and have them inspected.
A roof leak can increase fire risk, so fix leaks and get an electrical inspection after repairs.
Watch Video
Top Takeaways
- Inspect regularly to spot signs of wear early
- Use code-compliant components and protective devices
- Schedule professional audits for safety and compliance
- Document maintenance to track improvements and risks
- Prioritize immediate action on damaged wiring or overheating