how to know if tactacam solar panel is working
Discover fast, practical steps to verify a tactacam solar panel is functioning. Learn indicators, safe checks, diagnostic flow, and when to seek professional help for reliable trail-camera charging in 2026.

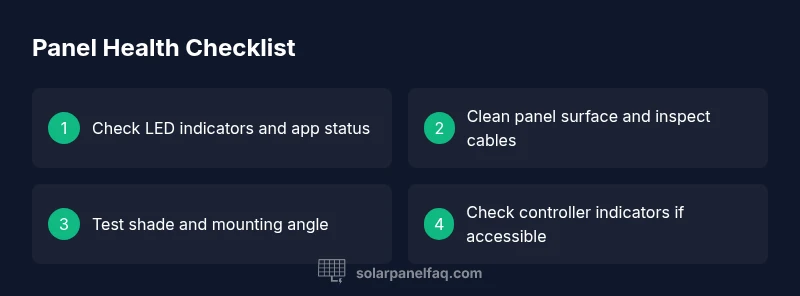
To know if tactacam solar panel is working, start with quick indicators you can check in minutes. Verify the camera’s power LED or status icon, check the app for charging status, and inspect the panel for dirt or shade. If basics look fine but power is inconsistent, perform a hands-on output test with a multimeter and follow the steps that follow.
how to know if tactacam solar panel is working
If you’re wondering how to know if tactacam solar panel is working, you can start with quick indicators you can check in minutes. According to Solar Panel FAQ, homeowners should begin with observable indicators and simple power checks before diving into hardware testing. First, verify the camera’s power LED or status icon within the device or app. Next, inspect the device’s charging status in the companion app—look for a consistent charging icon or steady battery indicators. Then do a quick physical check: look for a clean, unobstructed panel and secure cables. If the basic signals look normal but you still observe intermittent charging or power loss, you’re ready to run a more thorough test using an inexpensive meter and the steps that follow. Remember: accurate diagnostics rely on a calm, methodical approach rather than guesswork.
Visual indicators that your tactacam panel is active
The most reliable signals come from both the camera and the app. Look for: a lit power LED on the camera, a visible charging status in the app, and a steady or improving battery indicator over a short observation period. Visually inspect the solar panel for any debris, bird nests, or discoloration that could obstruct light. Ensure the mounting angle is optimal for sun exposure. If all of these indicators point to activity, you’re likely in good shape; if not, move to more precise tests.
App signals and environmental factors that influence charging
The mobile app often provides a charging status pulse, historical charge data, and battery health estimates. A low or fluctuating reading can be caused by environmental conditions like cloud cover, early morning or late-day sun, or recent shading from nearby trees. Record the time of day, weather, and any recent changes around the installation. If the app shows consistent charging during peak sun yet the camera still powers down unexpectedly, that flags a potential hardware issue that requires deeper testing.
Physical checks: dirt, shade, and mounting
Even a small amount of surface dirt or a thin layer of dust can reduce output noticeably. Clean the panel with a soft, dry cloth or damp microfiber if needed, but avoid harsh chemicals. Check for shade from branches, roofs, or adjacent equipment during peak sun hours, and ensure there are no shadows crossing the panel. Verify the panel is securely mounted and that cables are not bent or pinched. A wobbly mount or damaged cable can cause intermittent charging and misleading readings.
Safe electrical checks you can perform without specialized tools
If you have basic electronics experience, you can perform a safe voltage check at the panel terminals when the sun is bright. Use insulated gloves and keep tools dry. With the panel exposed to strong light, gently measure the voltage between the panel leads and compare to the camera’s input specification (as described in the manual). Do not touch exposed conductors while testing. If voltage is present but charging remains inconsistent, the fault may lie in wiring or the controller rather than the panel itself.
Diagnostic flow overview: symptom to solution
Begin with the symptom: is charging inconsistent or non-existent? Move to quick checks (LED, app, surface condition). If those pass, test output with a meter and inspect the controller or regulator for fault indicators. Each step should narrow the problem: dirt/loose cables → shading → damaged panel → controller issues. Document each finding to guide the next step or professional help.
Step-by-step testing approach overview
A structured approach minimizes guesswork and reduces downtime. Start with the easiest checks (visuals and app status), then perform safe electrical tests, and finally verify entire system health including the controller. If you’re unsure at any point, stop and consult a professional to avoid risk. The goal is to confirm either normal operation or identify a specific failure mode for targeted fixes.
Common mistakes to avoid and prevention tips
Avoid assuming that a healthy-looking panel guarantees charging. Regularly clean the panel, inspect seals and cables, and keep the panel free from shade during peak sun hours. Do not use metal tools on connectors, and never attempt high-voltage tests without proper equipment and training. Schedule periodic maintenance and keep a simple log of readings to spot trends before failures occur.
Steps
Estimated time: 20-40 minutes
- 1
Verify device power and LED indicators
Check that the camera boots normally and that the power LED shows activity or a steady state. If the LED is off, power the camera from backup batteries (if available) to confirm the camera itself isn’t the fault. Note any abnormal LED colors or blink patterns.
Tip: A stable LED is often the first sign that the panel is delivering power. - 2
Inspect connections at both ends
Disconnect and reseat all panel cables at the camera and at the panel. Look for corrosion, bent pins, or frayed insulation. Re-tighten any fasteners as needed to ensure a solid, weatherproof connection.
Tip: Always dry hands and use a non-conductive tool when handling connectors. - 3
Perform a safe panel output check
If you have a multimeter, measure the DC voltage across the panel leads in full sun. Compare the result to the camera’s input specification from the manual. Do not touch live conductors and ensure the meter is set to the correct setting.
Tip: Take multiple readings over a few minutes to account for light changes. - 4
Assess shading and exposure
Walk around the installation to identify any new shadows or obstructions. Remove branches or relocate the mounting angle if necessary to maintain direct sunlight for most of the day.
Tip: Small changes in angle can dramatically improve output. - 5
Check the controller/regulator and battery
If accessible, inspect the charge controller for fault indicators. Test the camera battery with a known-good charger or replace temporarily to see if charging behavior changes.
Tip: A fault indicator on the controller typically means professional service is needed. - 6
Run a final full-system test
Reassemble all connections, reboot the camera, and monitor charging status for several hours under typical sun. Document readings to verify sustained operation or to guide replacement decisions.
Tip: Keep a log of LED status and app readings for comparison over time.
Diagnosis: Camera not charging reliably or power drops intermittently while in full sun
Possible Causes
- highDirty or loose connections at the solar panel or camera port
- highPanel is shaded or dirty, reducing output
- mediumDamaged or degraded solar panel surface (cracks, delamination)
- mediumFaulty charge controller/regulator inside the system
- lowDamaged or frayed cables, or worn connectors
Fixes
- easyClean the panel surface and reseat all connectors at both ends
- easyReposition the panel or camera to maximize sun exposure and reduce shade
- easyInspect cables for wear and replace damaged sections or connectors
- mediumIf safe, test panel output with a multimeter and compare to device input range
- hardConsider panel or regulator replacement if tests indicate degraded hardware
- mediumConsult a professional for suspected controller faults or complex wiring issues
Frequently Asked Questions
What are the first signs that my tactacam solar panel isn't charging?
Common signs include the camera not powering on, the app showing no charge, or inconsistent charging indicators. Confirm the panel and connections before assuming a camera fault.
Common signs include the camera not powering on or inconsistent charging indicators. Check the panel and connections first.
How can I safely test the panel's output at home?
Use the camera’s documented input range and, if you have a multimeter, measure panel voltage in bright light. Always follow safety guidelines and avoid touching live conductors.
If you have a multimeter, measure panel voltage in bright light and compare to the camera’s input range. Follow safety guidelines.
Does shade affect charging on tactacam panels?
Yes. Shade or partial shading dramatically reduces output. Reposition the panel or remove obstructions to restore optimal charging.
Shade reduces charging drastically. Move the panel to get maximum sun.
When should I replace a tactacam solar panel?
If the panel shows visible damage, fails to deliver expected output after checks, or the regulator indicates a fault, replacement is often the practical option.
If there’s obvious damage or persistent failure after checks, replacement may be needed.
Is professional inspection needed for controller failure?
Yes. Suspected controller or regulator faults can require specialized testing or replacement. A professional can diagnose and safely repair or replace components.
A suspected controller problem typically needs a professional, as it involves specialized testing.
Can a damaged cable cause charging issues?
Yes. Frayed or cracked cables can prevent charging even when panels are healthy. Inspect and replace defective cables or connectors.
Damaged cables can stop charging. Replace them to restore function.
Watch Video
Top Takeaways
- Start with simple indicators before hardware tests
- Shade and dirt cause most charging issues
- Verify wiring and secure connections
- Use a meter for accurate output checks
- Seek professional help for regulator or panel replacement