How to Create a Solar System on Snapchat: Step-by-Step Guide
Learn to build a solar-system AR lens on Snapchat with Lens Studio. This step-by-step guide covers concept planning, asset prep, orbital animation, testing, and publishing for educational, entertaining experiences.

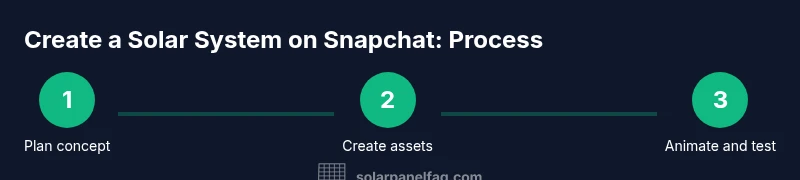
Learn how to create a solar system AR experience on Snapchat using Lens Studio. You’ll plan a compact solar system, build planet models, animate orbiting paths, and add tap-to-info interactions. This guide covers concept, assets, basic scripting, testing, and publishing so you can share a playful, educational Snapchat lens with friends.
What you can build with a solar system on Snapchat
If you're asking how to solar system on snapchat, this guide shows you how to design a captivating AR lens that places a miniature solar system into the real world. According to Solar Panel FAQ, clear, testable steps help beginners avoid frustration. The aim is to deliver an educational, interactive experience that is performant on mid-range devices and complies with Snapchat's guidelines. This block expands on the concept, target devices, and user experience considerations so you can plan effectively before you start building.
In practice, a well-crafted Snapchat solar system lens lets users explore the order of planets, observe orbits, and tap planets to reveal quick facts. You’ll balance realism with performance, ensuring textures are optimized and the scene remains responsive on a range of smartphones. By following structured steps, you can move from idea to a working prototype in a few sessions.
Planning your solar system concept
Before touching Lens Studio, define the scope of your solar system experience. Decide which planets to include, whether to show orbital paths, and how users will interact with each planet (tap, hold, or hover). Map the scale so that inner planets appear close, outer planets farther away, and consider a sun centerpiece as the anchor. This planning stage reduces rework later and helps you estimate asset needs and performance targets. As Solar Panel FAQ Team would say, clarity upfront saves time later.
Required tools and resources
To bring the solar system to Snapchat, you’ll need a computer capable of running Lens Studio, the Lens Studio software itself, and a library of 3D planet models with textures. Include a simple lighting setup, a stable internet connection for asset downloads, and a test device to verify performance. Optional but helpful: a version-controlled asset folder and a sketch board for planning layouts and orbit sequences.
Design and assembly workflow
Create a new Lens Studio project and set up a solar-system scene with a sun, orbital planes, and planet nodes. Import your planet models and textures, then arrange them along a central axis with parent-child relationships to ease orbit animation. Use the Timeline or keyframes to animate each planet’s rotation and orbital path. Keep layer counts modest to maintain a smooth framerate on mobile devices.
Implementing orbit animation and interactivity
Assign each planet a rotation animation for the planet itself and a separate orbit path around the sun. Create simple scripts or use built-in interactions to allow taps to reveal planet names and facts. Consider adding a reset control to return planets to initial positions, and a quick-start tour that users can trigger with a single tap. Test different speeds to evoke a realistic feel without overwhelming the device.
Testing, performance, and accessibility considerations
Test your lens on multiple devices to gauge frame rate and responsiveness; optimize textures (compress where appropriate) and reduce polygon counts where possible. Ensure accessibility by including readable labels, high-contrast colors, and alt text for any UI elements. Be mindful of Snapchat’s community guidelines and privacy expectations when collecting any user data or triggering analytics.
Publishing and sharing your Snapchat solar system lens
Prepare a compelling description, set appropriate audience controls, and submit your lens for review. Include clear educational value, accessibility notes, and usage tips to help reviewers understand the intent. Once approved, promote the lens with a short demo video and share links across social channels to maximize visibility.
Tools & Materials
- Computer (Windows or macOS) with current OS(Should meet Lens Studio system requirements)
- Lens Studio installed(Latest stable version)
- 3D planet models (OBJ/FBX)(Low-poly preferred for performance)
- Planet textures (diffuse/normal maps)(Optimize texture size for mobile)
- Stable internet connection(For asset downloads and updates)
- Test device (iOS/Android)(To validate framerate and UX)
- Snapchat Publisher profile(Required to publish lens on Snapchat)
- Asset organization folder(Versioning and backups helpful)
Steps
Estimated time: 2-4 hours
- 1
Define concept and scope
Outline which planets to include, whether to show orbits, and how users will interact. Create a simple storyboard to map screens and interactions. This keeps scope realistic and reduces rework.
Tip: Keep the list short; fewer planets means easier optimization. - 2
Prepare assets and textures
Collect or create planet models with textures. Ensure textures are compressed for mobile devices and that normals are consistent for lighting. Organize assets in a dedicated folder for quick access.
Tip: Name assets consistently (e.g., planet_earth.obj) to reduce confusion. - 3
Set up a Lens Studio project
Create a new project, set the scene scale, and add a sun at the center. Create planet placeholders as child nodes of the sun to simplify orbit animation. Save frequently.
Tip: Use a plain background and neutral lighting during early iterations. - 4
Implement orbit animations
Animate each planet’s rotation and orbit using keyframes or timeline assets. Keep orbit speeds proportional to planet distances for a believable feel. Test orbit order to ensure accuracy.
Tip: Start with 2-3 planets before adding more. - 5
Add interactivity
Create tap gestures to reveal planet information cards. Include a reset button to return planets to their initial positions. Consider an onboarding tour to guide first-time users.
Tip: Make tap targets large enough to be tapped accurately. - 6
Optimize performance
Reduce polygon counts, compress textures, and test framerates on the target devices. Disable nonessential effects if needed to maintain 30fps or higher.
Tip: Use LODs for distant planets to save performance. - 7
Test, validate, and publish
Perform device testing, gather feedback, and ensure compliance with Snapchat guidelines. Prepare a clear preview video and description for submission.
Tip: Run a final QA pass focusing on UX and accessibility.
Frequently Asked Questions
What is Lens Studio and can I use it for Snapchat?
Lens Studio is Snapchat's official AR creation tool. It lets you build interactive lenses with 3D models and animations without heavy coding. Start with templates and adapt them to your solar system concept.
Lens Studio is Snapchat's official AR tool for creating lenses with templates and assets, no deep coding required.
Do I need programming knowledge to create the solar system lens?
You don't need advanced programming. Lens Studio supports visual scripting and keyframes for animations. For orbit paths, use parent-child relationships and timeline animations.
No heavy coding needed; use built-in tools and keyframes.
What performance considerations should I plan for?
Aim for low-poly planets, optimized textures, and a small scene. Test on several devices to keep a steady 30fps or higher.
Keep it lightweight; test on real devices for smooth performance.
Can I publish the Snapchat solar system lens?
Yes. You can publish after complying with Snapchat's guidelines and privacy requirements. A clear description helps reviewers understand the educational value.
You can publish after Snapchat approves it.
Are there ready-made assets I can use?
Yes, you can source free or paid 3D planet models with licenses suitable for AR projects. Verify licenses to avoid distribution issues.
There are planet models you can use with proper licenses.
Watch Video
Top Takeaways
- Plan scope before building
- Optimize assets for mobile
- Test early and often
- Publish with clear education value