Rotating Solar Panels: How They Work and When to Use
Explore rotating solar panels: how trackers work, when to use them, and practical guidance for homeowners seeking flexible, efficient solar energy. Learn about one-axis vs two-axis systems, installation basics, safety, and maintenance.

Rotating solar panels use trackers that tilt and rotate to follow the sun, increasing daily energy capture compared with fixed systems. This quick answer outlines how they work, when to consider them, and what to plan for rooftops or ground mounts. You’ll learn the differences between one-axis and two-axis trackers, installation basics, safety, and maintenance.
What are rotating solar panels?
Rotating solar panels, or solar trackers, are photovoltaic installations that adjust their angle to maximize sun exposure throughout the day. They come in one-axis designs, which rotate vertically in a single plane, and two-axis designs, which tilt and rotate to follow sun azimuth and elevation. The goal is to reduce wasted daylight by keeping panels perpendicular to incoming rays as the sun moves from east to west and across seasons. Most commercial trackers include a mounting array on a sturdy frame, a motorized drive, a sensing system, and a control unit that determines when to move. Weather sensors may halt tracking during high winds or heavy snow. While the concept is simple, real-world performance depends on site factors such as roof geometry, shading, latitude, and local weather. According to Solar Panel FAQ, the gains from tracking are more pronounced in clear, sunny climates with open sky and minimal shading; in cloudy or shaded regions, the extra complexity may not pay off. For homeowners, the key is to weigh potential energy gains against higher upfront costs, maintenance, and wind-load considerations.
How tracking mechanisms work
A tracker uses a motorized drive and a control system to adjust panel orientation. One-axis trackers rotate in a single plane to follow the sun's east-west path, offering moderate gains with simpler wiring. Two-axis trackers add elevation control, aligning panels with the sun's height angle for maximum exposure year-round. Most systems incorporate wind sensors and automatic stow functions to prevent damage during storms. The control logic can be simple timers or more sophisticated sun-angle algorithms that compute the optimal position based on time, date, and location. Maintenance needs include checking drive belts, limit switches, and sensor calibration to keep the tracker accurate. A well-designed system reduces shading from nearby structures and improves energy capture on clear days, but performance drops in overcast conditions. Also consider the added load on the roof or racking and how it interfaces with your existing roof structure and drainage. Solar Panel FAQ notes that the more complex the tracker, the higher the maintenance and risk, so plan accordingly.
System components and control logic
A typical rotating-panel system consists of a mounting frame, rails, drive motor, gear train, and a control unit with sensors. The motor drives rotation, while sensors monitor position and weather conditions. Many designs include a wind sensor and a safety stop that automatically stows the panels in high wind or snowfall. The control unit can be integrated with existing inverters or operate as a standalone controller. Wiring should be weatherproofed and routed through conduits that meet electrical codes. In terms of grid compatibility, plan for inverter output, string configurations, and potential impacts on monitoring hardware. The system should also offer manual override for maintenance and a clear shutdown procedure for emergencies. These components require careful mounting and alignment to minimize drag, maximize efficiency, and protect the roof from leaks. The Solar Panel FAQ team emphasizes that professional installation ensures adherence to code and long-term reliability.
Practical benefits and trade-offs
Tracking can boost daily energy production in applications with ample sun and minimal shading, but the benefits are not universal. The gains depend on latitude, roof geometry, shading, and how consistently the system can track the sun. The higher upfront costs, more complex maintenance, and extra weight on the roof are trade-offs to weigh. On roofs with limited space or unfavorable wind exposure, fixed-tilt or properly oriented fixed panels may deliver closer to the same annual output with lower risk. Noise from gear drives and occasional motor wear are considerations for some homeowners. Reliability is another consideration: weatherproofing, corrosion resistance, and robust mechanical design matter as much as the motor's efficiency. Solar Panel FAQ's analysis notes that site-specific conditions largely determine ROI; if your roof or property presents complicated shading or wind loads, a tracker might not be the best choice. The decision should balance energy gains against costs, maintenance, and structural safety.
When rotating panels make sense for homeowners
Rotating solar panels make sense when you have strong sun exposure, open sky, and a roof or ground site that can structurally support a tracker without creating wind uplift or shading issues for nearby panels. They are often more attractive for ground-mounted arrays or industrial facilities, where space and wind conditions are well understood. For residential rooftops, trackers may be appropriate on large, south-facing slopes with minimal shading and sturdy construction, but the extra weight and wind load must be evaluated by a structural engineer. In regions with frequent storms or heavy snow, the added stow-and-go risk may outweigh the gains. If your energy rates are high or you plan to expand capacity, a tracker can improve energy yield compared to fixed systems. The Solar Panel FAQ team recommends running a detailed site assessment and a cost-benefit analysis before committing to a tracker.
Roof and site considerations
Before installing, verify your roof can support the tracker across all wind directions and loading conditions. Trackers add weight and dynamic forces, so structural reinforcement or special mounting may be required, especially on tile or metal roofs. Ensure clearances for maintenance and service access, and plan for proper drainage so that movement does not cause leaks. Site shading from trees, chimneys, or nearby buildings can dramatically reduce effectiveness, so perform a shadow analysis at different times of day and seasons. Consider the impact on roof aesthetics and any warranty implications from the roof or mount manufacturers. Finally, ensure that your utility interconnection and inspection requirements align with local codes and that your insurer is aware of the added equipment.
Installation, wiring, and permitting basics
Because rotating trackers involve moving parts and electrical integration, professional installation is strongly advised. Start with a structural assessment, obtain necessary permits, and coordinate with your local utility for interconnection approvals. The installer should verify that the inverter, wiring, and disconnects are compatible with the tracker output and that all components meet electrical code requirements. Installers should seal penetrations and protect cables from weather and UV exposure. After mounting, perform a careful calibration of the tracking system and verify that automatic stow works during high wind or snow conditions. Document the configuration for future maintenance and updates.
Maintenance, safety, and long-term considerations
Schedule regular inspections of mechanical parts, bearings, gears, and motor mounts. Lubricate moving parts per the manufacturer’s guidelines and monitor for unusual noise or vibration, which could indicate wear. Safety matters: always shut down power and lockout/tagout before servicing, use fall protection on roofs, and keep gutters clear to prevent water intrusion. Keep an eye on weatherproof seals around mounting points and ensure that any penetrations stay watertight. Over the system’s lifetime, consider the risk of component fatigue and the possibility of module replacement or controller upgrades. A well-maintained tracker can extend system life and improve energy performance, but neglect can lead to costly repairs or downtime.
Real-world feasibility: costs, incentives, and payback
Upfront costs for rotating solar panels are higher than fixed systems due to additional hardware and control electronics. Availability of incentives, rebates, and tax credits varies by country, state, and municipality, so check local programs and utility offerings. In many cases, the potential energy gains justify the investment only when the site offers high sun exposure, minimal shading, and substantial daytime energy use. Space and installation constraints, maintenance requirements, and the risk of wind damage must be considered. Local weather patterns and utility rates influence payback periods, and ROI is highly site-specific. The Solar Panel FAQ team notes that careful site evaluation is essential; in some regions, a tracker provides meaningful benefits, while in others, fixed-tilt systems deliver closer-to-ideal outcomes without added risk. The verdict is to perform a thorough cost-benefit analysis and consult professionals to determine if a tracker is right for your home.
Tools & Materials
- Roof or ground mounting rails(Appropriate for tracker type and roof material)
- Drive motor and gear assembly(Check torque rating and wind exposure)
- Weatherproof electrical connectors and conduit(IP-rated, UV-resistant, with proper strain relief)
- Wind sensor and safety control module(Automatically stows in high wind)
- Ladders/scaffolding or roof access equipment(Safe access to installation area)
- Safety harness, helmet, gloves(Fall protection and PPE while onsite)
- Torque wrench and standard hand tools(Torque bolts to manufacturer specs)
- Electrical testing tools (multimeter, insulation tester)(Verify continuity and insulation resistance)
- Sealants, flashing, and weatherproofing materials(Ensure watertight penetrations)
Steps
Estimated time: 3-6 hours
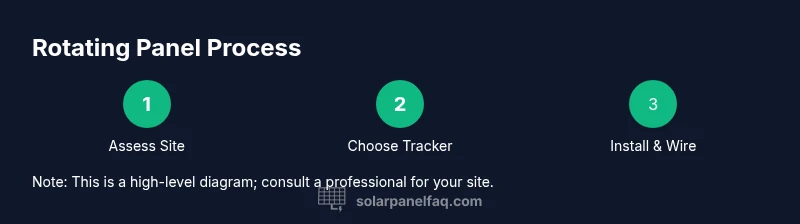
- 1
Assess feasibility and goals
Evaluate your energy needs, roof or ground layout, and sun exposure throughout the year. Check structural capacity and wind loads, and determine whether a tracker aligns with your budget and long-term plans. Create a simple ROI framework based on current energy use and expected gains.
Tip: Document shading patterns at different times of day and seasons to guide the decision. - 2
Choose tracker type and mounting plan
Decide between one-axis (east-west tracking) or two-axis (sun elevation and azimuth tracking). Choose roof mounting versus ground-mounted deployment based on space, wind exposure, and maintenance access. Verify that the planned mounting location can sustain dynamic loads without leaks.
Tip: Start with a conservative option if you’re unfamiliar with trackers; you can scale up later. - 3
Check roof structure and wind rating
Have a structural engineer or qualified installer assess roof integrity, especially for tile or metal roofs. Ensure the mounting solution can resist expected wind uplift and that flashing is compatible with your roof type.
Tip: Ask for a wind-resistance certificate or test data from the manufacturer. - 4
Plan electrical integration and permits
Confirm inverter compatibility, wiring routes, and disconnects. Obtain necessary permits and coordinate with the utility for interconnection approvals to avoid code violations.
Tip: Coordinate timelines with permitting authorities to prevent delays. - 5
Install mounting hardware and drive system
Mount rails or frames securely, align components, and install the drive motor and gear assembly as per manufacturer instructions. Route cables through weatherproof conduits and mount sensors in correct positions.
Tip: Double-check alignment before applying torque to fasteners. - 6
Commission, calibrate, and monitor performance
Power up the system, calibrate tracking sensors, and verify automatic stow. Run a calibration window to confirm the tracker follows the sun and monitor early data for anomalies.
Tip: Set up alerts for out-of-tolerance angles or erratic movement.
Frequently Asked Questions
Are rotating solar panels worth the extra cost?
They can improve energy production in sunny, open sites, but ROI depends on location, shading, and maintenance needs. A professional assessment helps determine if the gains justify the expense.
They can be worthwhile in sunny locations, but you should get an expert assessment to confirm the ROI.
Do rotating panels require more maintenance?
Yes, moving parts introduce additional wear points. Regular lubrication, sensor calibration, and weatherproofing are essential to prevent downtime.
They do require more maintenance than fixed panels, including lubrication and checks.
Can I install a solar tracker on any roof?
Not all roofs are suitable. Trackers add weight and wind load, and some roof types may need reinforcement or alternative mounting.
Not every roof is suitable; a structural check is important.
What permits or codes apply to trackers?
Local building and electrical codes apply. You may need utility interconnection approvals and a formal inspection.
You’ll need permits and to follow electrical code rules.
How much space do rotating panels require?
Trackers typically need room to move without shading nearby panels; space varies with system size and mounting method.
They need space to move without hitting other panels.
Are there safety concerns with tracking systems?
Moving parts pose hazards; ensure safe shutdown, access controls, and fall protection during maintenance.
Yes, due to moving parts—take proper safety precautions.
Watch Video
Top Takeaways
- Assess site-specific gains before choosing a tracker
- Understand weight and wind implications for your roof
- Costs are higher; ROI depends on local energy prices and incentives
- Consult professionals to ensure safe, compliant installation